 Injury Master
 Claims Master
 Premium Master
 Data Master
 Master Apps
Add a Claim
There are two ways to add a claim, you will be redirected to the same page for both options:
Option 1:
- Select Claims on the navigation bar
- Select + Add from the menu that appears
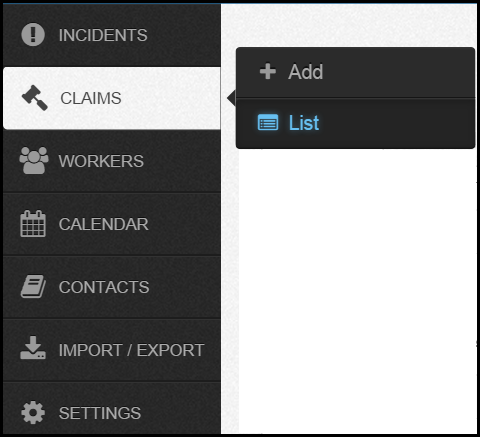
Option 2:
- Select Claims on the navigation bar
- Select List from the menu that appear - this will redirect you to the Claims Summary Page (also know as the landing page).
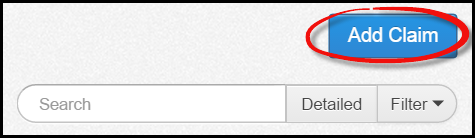
- Click the blue Add Claim button on the right-hand side.
You will then be redirected to the Add Claim page, as shown below. Complete the information required and save. You can edit and add to this information at any stage.
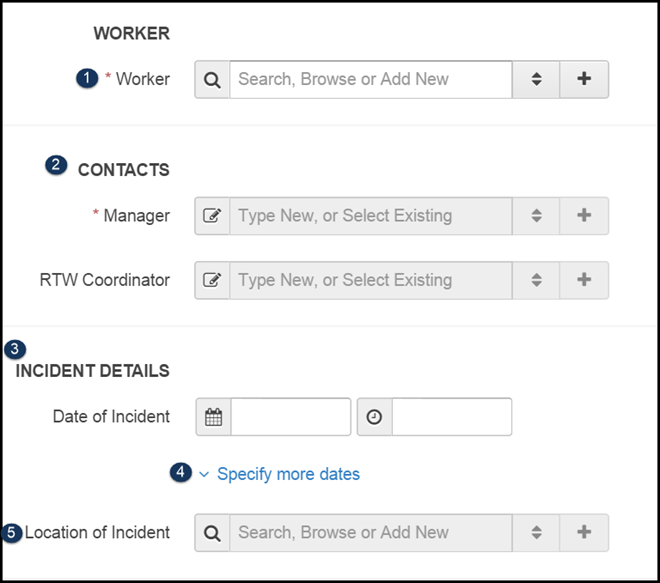
1. Worker
Select the the worker. You can select a worker already in the Injury Master system by either:
- Browse Workers - Select the two arrows next to the text field - a pop up list will appear containing the workers currently in the system.
- Search Workers - Begin typing the workers in the text field and a drop down of matching options will appear to select from.
Or Add a New Worker
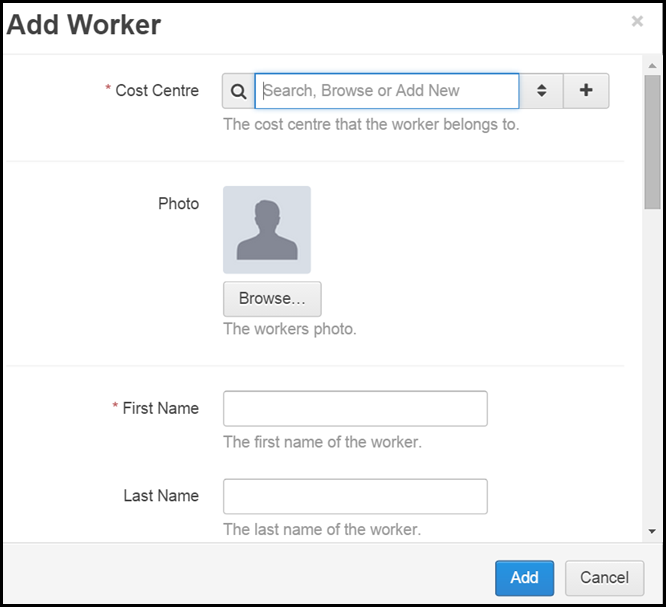
If the worker is not already in the Injury Master system add the worker to the system by selecting the + button.
A pop up will appear which requires completion, please see image below.
- Select the cost centre the worker belongs to.
- Complete the workers personal information.
If the workers information requires amending please go to the Workers area (on the navigation bar). Further information on Workers can be found in the Workers section of the Zen Desk.
Workers information can also under the Edit Claim tab in the Claims view area (once the claim had been created).
2. Contacts
Manager - Select the Manager of the worker by either:
- Selecting the two arrows next to the text field
- Begin typing in the text field and a drop down of matching options will appear to select from.
OH&S Manager - Select the OH&S Manager assigned to the incident by either:
- Selecting the two arrows next to the text field
- Begin typing in the text field and a drop down of matching options will appear to select from.
If the contact is not already in the system you can Add new contact.
You can also add a new contact to the system and claim in this area by selecting the + button and completing the pop up. This will also be added to the Contacts area.
This is an optional field.
3. Incident Date
Select the Date & Time of the Incident.
Although these are optional fields it is important to complete them as soon as you have the information.
If you complete the date field the time field must be complete also.
4. Specify More Dates
Select Specify More Dates to enter more details regarding the incident such as First Work Day Lost.
By selecting this option further fields will appear, as shown below, which you have the option to complete.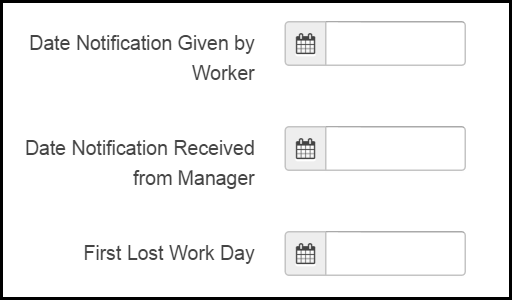
5. Location of Incidents
Input the location where the incident took place by either:
- Selecting the two arrows next to the text field
- Begin typing in the text field and a drop down of matching options will appear to select from.
- Add a new location by selecting the + button next to the field. Complete the pop up and save to the system.
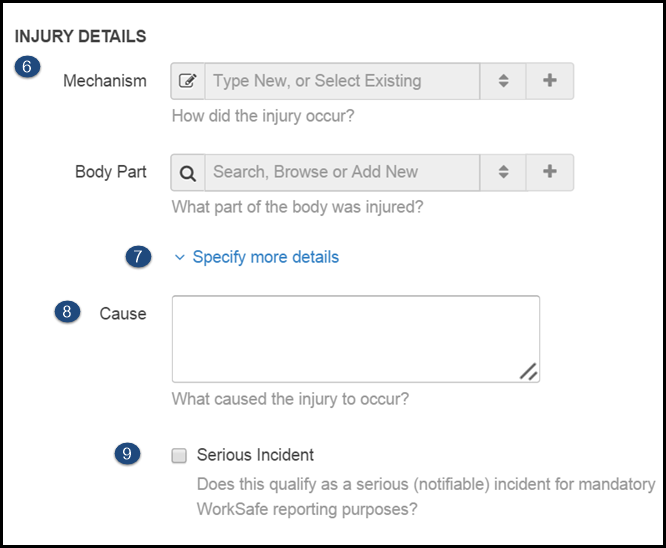
6. Injury Details
Although the following fields are optional it is recommended that they are completed so you have as much information as possible in the system.
Mechanism - Select how the injury occurred by either:
- Selecting the two arrows next to the text field
- Begin typing in the text field and a drop down of matching options will appear to select from.
Use the description that is the closest match from the list.
Body Part - Select what body part was injured by either:
- Selecting the two arrows next to the text field
- Begin typing in the text field and a drop down of matching options will appear to select from.
7. Specify More Dates
Select this to enter more details regarding the injury such as First Work Day Lost.
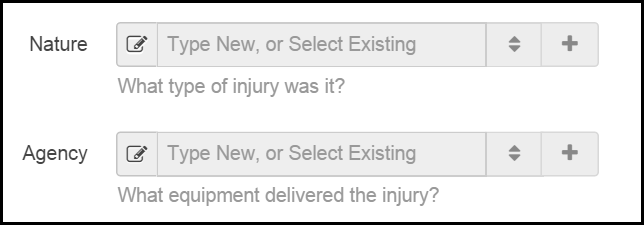
By selecting this option further fields will appear, as shown below, which you have the option to complete.
8. Causes
Input a description of what caused the injury to occur.
This is an optional free text box.
9. Serious Injury
Tick this box if the incident qualifies as a serious/notifiable injury as specified by WorkSafe or the relevant legislation.
10. Work Status
Current Hours Worked Per Week - prior to the date of the incident
Pre-Injury Average Hours Per Week - over the 52 weeks prior to the incident (if less during the period of employment).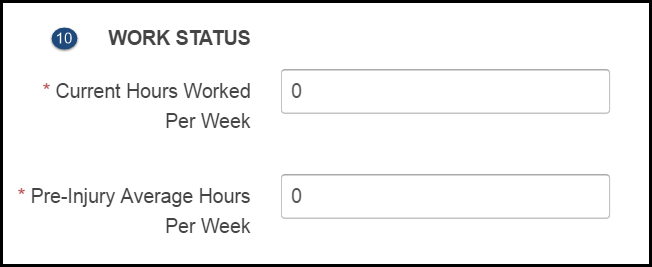
- Claim Details
Claim Status - select the claim status from the drop down. This field will automatically be set as Open Claim, change if required.
Liability Status - select where the liability of the claim is up to. This field will be automatically set as Accepted, change if required.
Premium Status - Select the premium status of the claim. This field will be automatically set as Premium Claim, change if required.
Claim Number -Once a claim is submitted it will be assigned a claim number. Input in to this field.
- Claim Details

12. Specify claim flags
Click on this to view claim flags, such as Time Loss or Permanent Impairment.
Click on the ? for more information on the flag.

Once you selected Save Changes the claim will be created and you will be directed to the claims full view page.
Please see Viewing Claims article for further information .