 Injury Master
 Claims Master
 Premium Master
 Data Master
 Master Apps
Files
The Files area of Injury Master is a library for storing files not specific to Incidents / Claims (in contrast to Documents). The FILES area is found in the in the Navigation Bar.
Files that can be stored in the Files area includes the following types:
- Smart Forms – system-generated forms that can be edited in the system and draws information from system fields
- Submittable Forms – smart forms that require submission to agent/insurer
- General – any file uploaded from your desktop. PDF and image files can be viewed in the system, but any other format must be saved before it can be viewed.
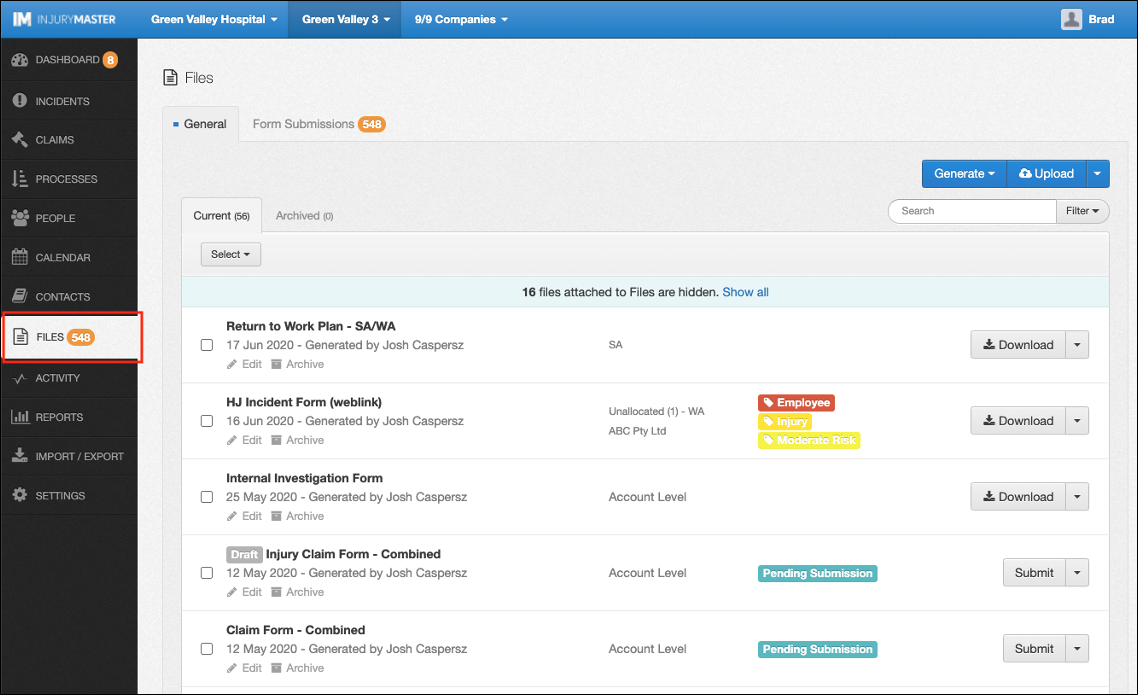
By default, the Files area also includes the Form Submissions area in its own tab. The orange number indicating number of active Form Submissions is also displayed next to FILES in the Navigation Bar.
For further information, please refer to Web-Linked Form Submissions.
File Visibility
Files stored in the Files area will by default be accessible to any account user, but can be made specifically visible to:
- The Account
- A Company and/or Scheme
- A Person (Employee, Contractor, General Public) – not specific to an Incident / Claim
- Private – visible only to specified Users
Visibility is specified either when a file is uploaded or from the Edit button beneath the File Name.
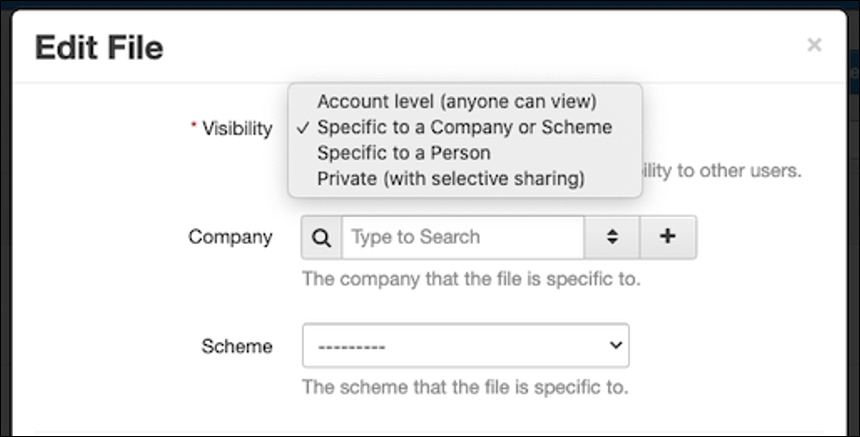
Selecting any option other than the default “Account level (anyone can view)” will then prompt you to specify a Company, Scheme, Person or Users (under Private) for whom the file will be made visible.
Viewing Files
Files are ordered with the most recent at the top, and capture the following information about each form submission:

- Title – name of the file (including Draft label if file is draft)
- Date – of creation of file (hover mouse to view date + time)
- Name – of User who Uploaded / Generated file (hover mouse to view date/time/User who created + date/time/User who most recently updated file)
- Edit – button to edit file details
- Archive – button to move file to Archived tab
- Notes – added optionally to the file
- Visibility – either Account Level, company/state, cost centre (connected to Person) or Private (with specified Users)
- Tags – attached to file for grouping/filtering
- Attachment Icon – select to display other files attached to this file
- Download – button to view file (online for PDF/image; save & open for other formats)
- Drop-Down – other options for handling files
Filtering Files
Forms can be searched for via the Search bar or by the following filters:

- ATTACHED TO
- Attached to Nothing (default)
- Attached to other Files
- Show All
- COST CENTRE (defaults to all cost centres including Account Level)
- FORM (defaults to all form types)
- TAGS (defaults to all forms including those with no tags)
For further information, please refer to Filters.
There are 2 other ways to view attached documents. To view all attachments, select View All. To view individual attachments, select the attachment button, then the eye icon.

For further information, please refer to Viewing Attached / Hidden Documents.
Edit File
By selecting Edit below the form (indicated by a pencil icon), the following window will appear with details about the file.
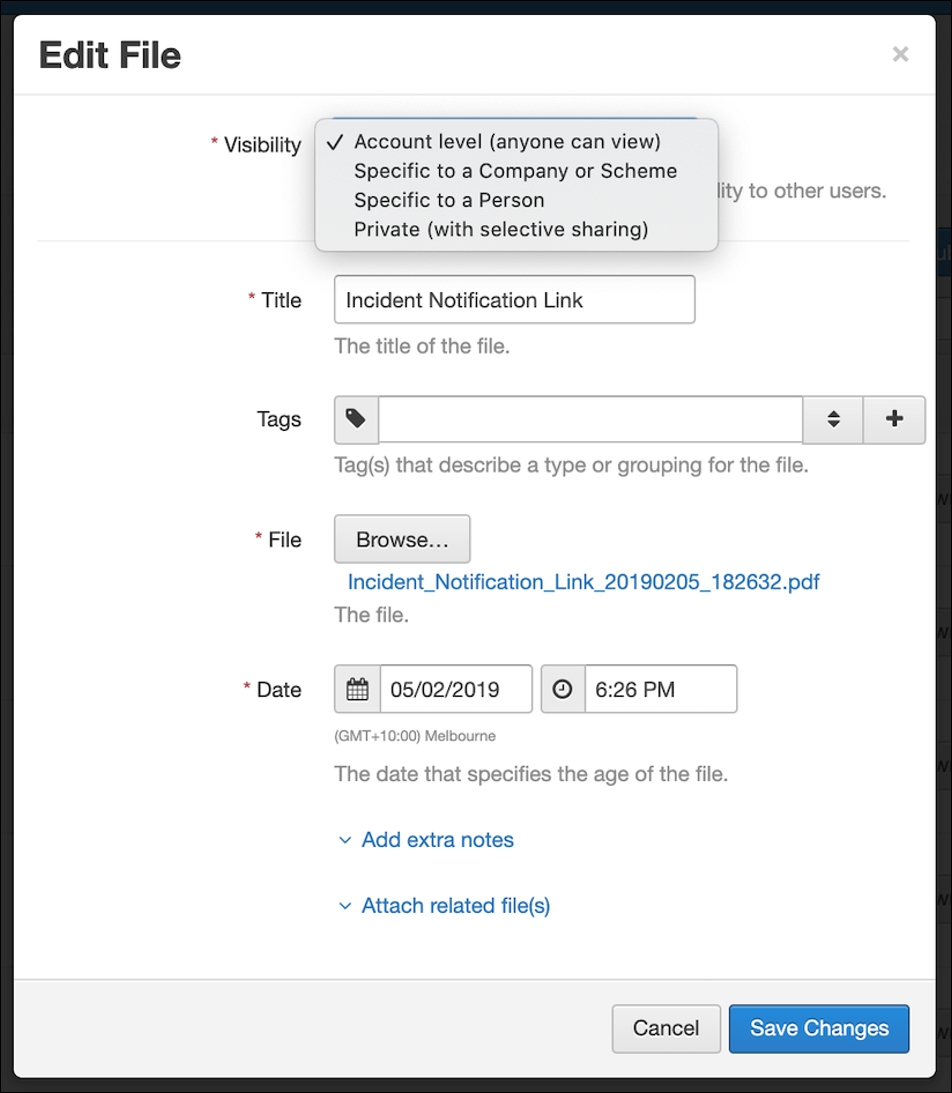
From here you can edit the following:
- Visibility – who can view the file
- Title – of the file
- Tags – visual cues to group or filter files
- File – the file itself
- Date – date and time that the file was generated/uploaded/submitted
- Add extra notes
- Attach related file(s)
Once you have finished editing the file details, select Save Changes.
Handling Forms
There are a number of other ways that files can be handled, according to the type of file. By selecting the drop-down arrow next to the Download button, you will see the following options:
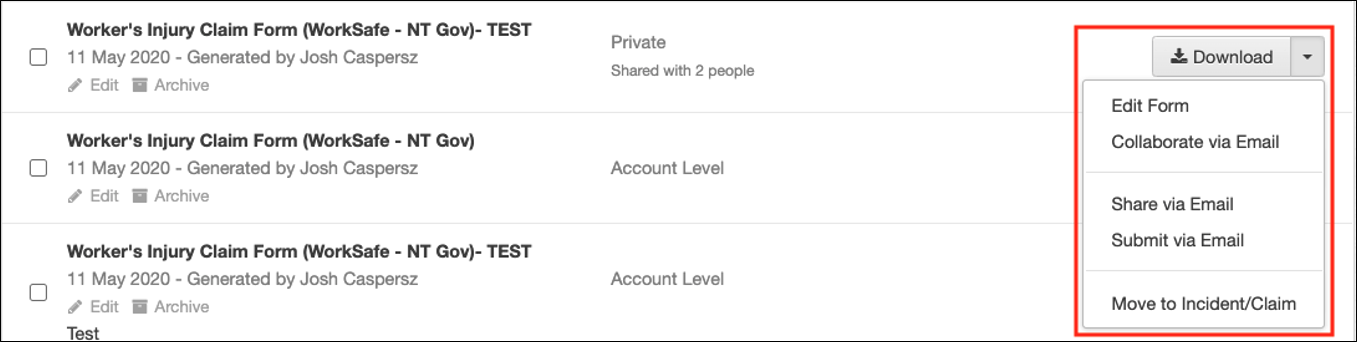
- Edit Form – edit the content of the Smart Form
- Collaborate via Email – share the Smart Form via email for the recipient to work on
- Share via Email – share the file as an attachment
- Submit via Email – submit the file to agent / insurer. File will be auto-tagged as Submitted
- Move to Incident/Claim – move the file from Files are to specific incident or claim
Prior to submission, Submittable Smart Forms are auto-tagged as Pending Submission and have a Submit button in place of the Download button. The drop-down arrow for these files presents different options:

- Mark Submitted – treat file as though it was submitted via email. Auto-tagged as Submitted
- Skip Submission – behaves the same as “Mark Submitted”, but auto-tags as Submission Skipped instead
- Download – view the file (position switched with Submit compared to other files)
Files can also be handled in bulk. Selecting forms by the tick-box or the Select all drop-down provides the following 3 options:

- Archive – move selected forms to Archived tab
- Download – save selected forms in a ZIP file
- Move – move selected forms to the Documents tab of an existing incident / claim
For more information on moving forms, please refer to Moving Form Submissions.