 Injury Master
 Claims Master
 Premium Master
 Data Master
 Master Apps
Medical Accounts - VIC
The purpose of the medical accounts feature is to record payments made and invoices requested in relation to the relevant claim such as medical receipts and invoices.
This feature is most useful for claims under the WorkSafe VIC policy.
- In Victoria the employer is liable for an excess (indexed annually) for the reasonable costs of treatment provided to the worker (unless the employer has the excess buyout option).
- The employer is required to keep copies of all invoices and receipts and forward them to the Agent once the excess amount has been paid.
The Medical Accounts area enables user to record payments made within excess, the feature will calculate the total paid out and the amount remaining before the excess is exceeded. Once a claim has reached the employer excess amount the user will be prompted to generate the relevant documents.
- After this excess amount has been paid, the employer Agent will coordinate directly with the worker and their healthcare providers to pay for treatment. Any invoices or receipts for medical treatment received by the employer should be forwarded the Case Manager.
Medical Accounts
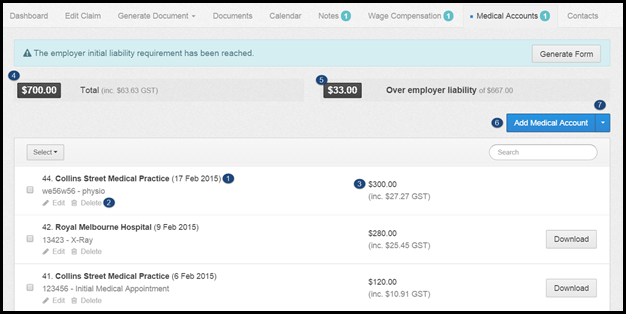
1. Summary of Medical Account
A summary of the details of the medical accounts added to the system are shown in a list, in chronological order with the most recent at the top.
The summary shows the receipt/invoice provider, what the receipt/invoice is for (services provided) and the amount. Each account can be assigned a reference/receipt number, which will show in the summary if provided.
2. Edit & Delete
Each account has edit & delete buttons allowing the user to make amendments to the account or remove it from the system.
Tick Boxes - You can delete multiple documents at a time by using the tick box next to the document name. When selected a delete button will appear next to the Select button.
3. Download Medical Account
Select this button to download and view the receipt/invoice attached to the medical account record.
This button will not show if there is no attachment. A user can add a new medical account record without attaching the relevant receipt/invoice, however, it is advised that all records have the relevant document attached as these will need to be provided to the agent if excess is reached and it ensures all records are kept for any future requirements.
4. Total Medical Account Amount
This shows the total medical account amount added to the system for the claim based on the information entered when adding a new medical account.
5. Remaining Amount
This is total amount remaining until the employer liability is met. The employer liability amount is shown in brackets on the right-hand side of the amount ($660).
This amount is calculated by subtracting the employer liability amount from the current total medical accounts amount, shown on the left-hand side (point 4).
6. Add New Medical Account
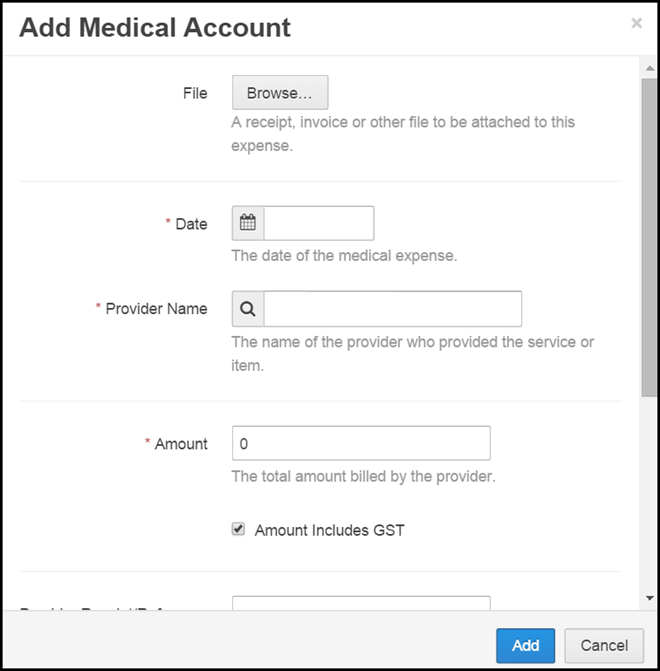
1. To add a new medical account please select the blue Add Medical Account button, on the right-hand side.
2. A pop-up will appear. Complete the fields and attach the relevant document and select Add, the record will then show in the medical accounts area.
The Amount Includes GST tick box is selected by default. If the amount does not include GST un-tick the box and the relevant GST amount will be added.
7. Generate Employer Liability Form
Once the employer liability amount has been reached you must provide copies of all invoices and receipts to your agent, as explained above.
When the liability amount is reached an alert will show at the top in blue stating The employer initial liability requirement has been reached with a Generate Form button on the right, as shown below.

1. Generating the form can be done through the system in two ways:
- Select the arrow next to the Add Medical Account button and selecting Generate Employer Liability Form, or
- Select the Generate Form button from the blue alert bar.
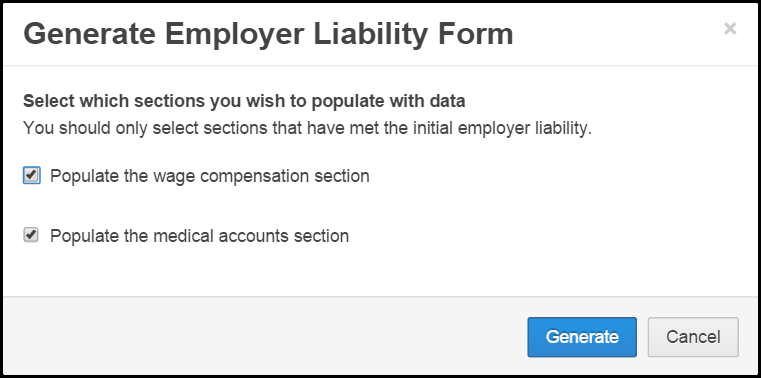
2. A pop up will then appear, as shown below, select which sections you wish to populate (you can generate both the wage compensation and medical accounts together). Select Generate.
3. You will then be redirected to the Wage Reimbursement Schedule in the Generate Documents area.
Information already in the system will be captured in the form, including the workers details and employer contact details. This information can be edited if required. 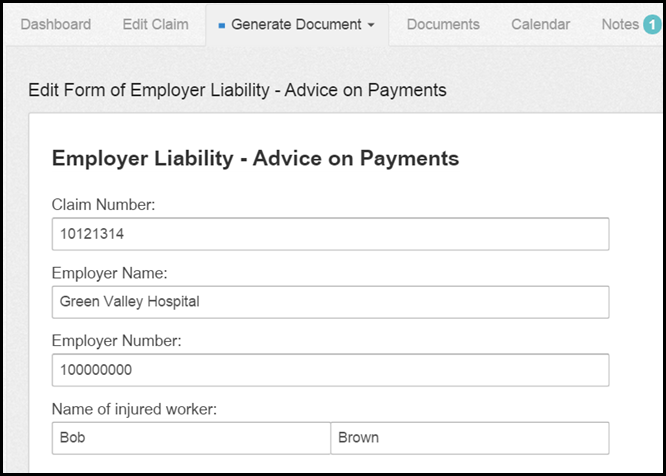
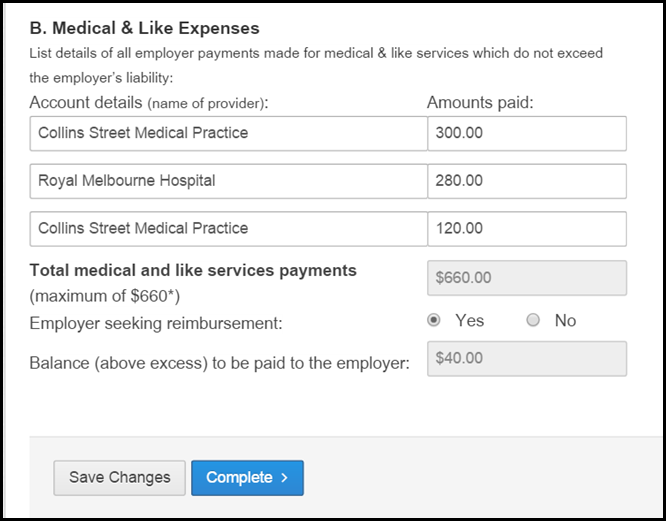
4. Complete all the relevant fields to ensure the form is accepted by the agent/insurer.
Once complete select the complete button (if the form is not yet complete select save changes to save in documents area allowing you to then go back and complete).
5. The document will then be generated. You can view the document by selecting Download or edit the form by selecting the Edit button.
6. Go into the Documents tab and find the document, you can then:
- Download by selecting the Download button on the right-hand side of the document
- Select the arrow drop-down, next to the Download button and select Edit to edit the document
- Select the arrow drop-down, next to the Download button and select Share via Email.
7. By selecting the Share via Email button a pop-up will appear. Enter the relevant email address and edit the contents of the email as required. Select Send to send email.
You can set the entered email address as default if this is the email address you commonly send the reimbursement form to.