 Injury Master
 Claims Master
 Premium Master
 Data Master
 Master Apps
Navigating Injury Master
The landing page for Injury Master once logged in is called the Dashboard. From here, you can use the Blue Bar and Navigation Bar to navigate your way around the system.
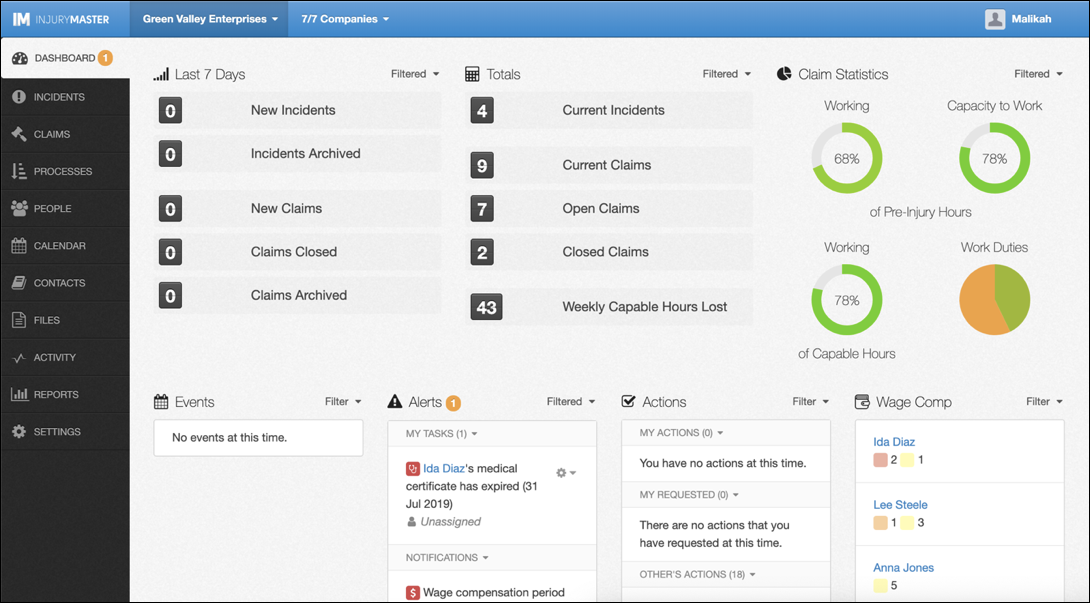
Blue Bar
The Blue Bar can be seen on the top of the page.

The Blue Bar has 4 elements:
- Injury Master Logo
- Account List
- Company Filter
- Profile Information
Injury Master Logo

Selecting the Injury Master logo will return you to the landing page at any time (the landing page is the Dashboard).
Account List
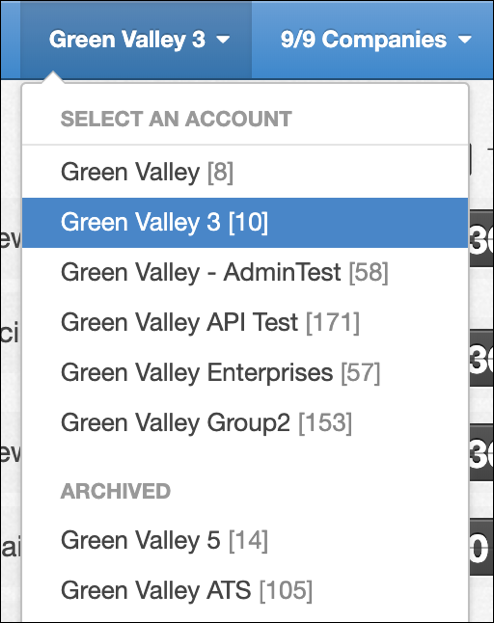
For most organisations, the Account List tab will simply show the name of your organisation. For organisations who have multiple accounts registered with Injury Master, the Account List tab will allow users to switch between their accounts.
Selecting the drop-down arrow provides a list of the names of all the organisations current and archived accounts which can be viewed by scrolling down.
When an account is selected, information relating to that account will be made visible. Please note that only 1 account can be selected at a time.
Company Filter
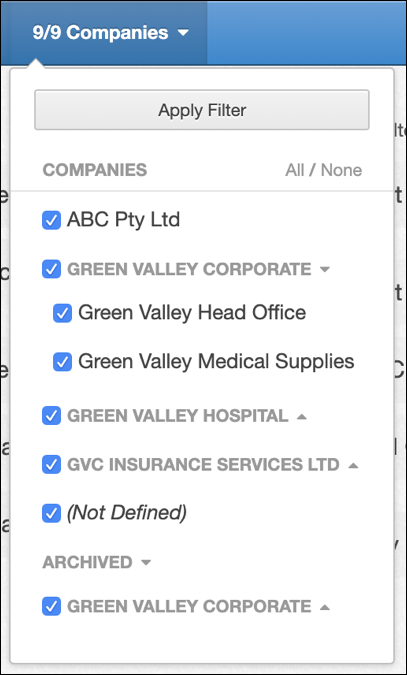
For organisations made up of multiple companies, the Company Filter tab provides a list of all of the companies within the organisation (and those Not Defined) which can be used to filter visibility. The fraction in the Companies heading indicates number of companies selected / total number of companies.
Companies can be individually selected / deselected by ticking the box next to the company name, or all selected / deselected at once by selecting All / None.
Companies with CAPITAL GREY text have sub-categories which can be viewed and further specified by selecting the company or drop-down arrow. Archived companies can also be used as a filter, which are viewed by selecting ARCHIVED.
Once the desired companies are ticked, selecting Apply Filter will make visible only the incidents, claims and workers assigned to the chosen companies. This filter will remain until it is manually removed or amended.
Profile Information

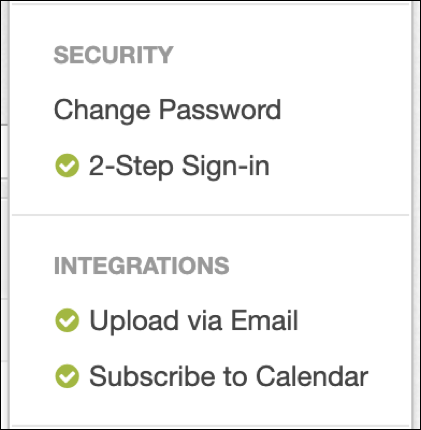
The Profile Information tab shows the user’s profile name and picture tile (if picture has been uploaded). Selecting the profile tab provides a list of personal settings.
Some settings have actions required to complete the setup of your profile. These are marked with an orange ( ! ). Once completed, these settings will be marked with a green (tick) (as above).
The available profile settings are as follows. You can learn more about these settings by selecting the headings:
- Alert Settings – customize your subscriptions and notifications
- Edit Profile – edit your user details including uploading a picture and signature
- SECURITY
- Change Password – for your Injury Master log-in
- 2-Step Sign-in – incorporate a 2-step authentication code to increase system security
- INTEGRATIONS
- Upload via Email – provides connection details and guide allowing user to upload attachments and filenotes directly via email
- Subscribe to Calendar – provides subscription link and guide allowing user to sync Injury Master calendar with their personal calendar
- Help & Support – Injury Master help desk articles
- Sign Out – immediately sign out of Injury Master and return to Sign On page
Navigation Bar
The Navigation Bar is the grey bar on the left side of the page. This provides a list of options which redirect you to the different areas of Injury Master.
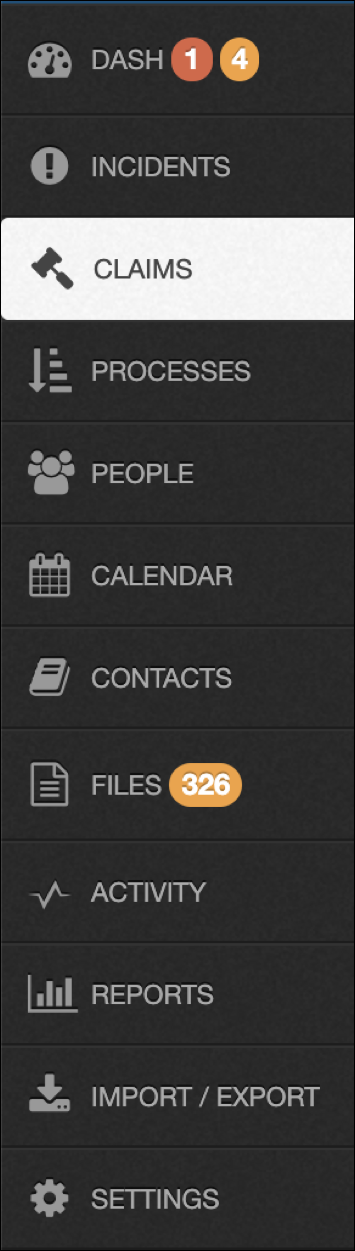
The coloured numbers next to the headings indicate the following:
- Dashboard (Red) – number of new tasks assigned to you
- Dashboard (Orange) – total number of tasks and actions assigned to you
- Files (Orange) – number of digital form submissions yet to be archived
Selecting the area you wish to view to will either redirect you to the relevant area or a pop-up menu will appear giving you further options for viewing (for Settings).
The following list provides a brief description of the different areas available in Injury Master. You can learn more about each area by selecting these headings:
- Dashboard – landing page of Injury Master, containing an overview of incident & claim information
- Incidents – list of all current and archived incidents
- Claims – list of all current and archived Workers Compensation claims
- Processes – list of all specialised processes for all incidents / claims
- People – database of all workers in the company, including employees, contractors and general public
- Calendar – monthly calendar including events for all incidents / claims across the company
- Contacts – database of contacts including managers, medical providers and agents connected to incidents / claims
- Files – database of general files and digital form submissions
- Activity – trail of all user activity including audits, sign-in log, and email / SMS archive
- Reports – database of reports which can be generated reflecting live data, including Standard, Claims Cost and Premium information
- Import / Export – function for bulk importing / exporting of payment information
- Settings – list of account level settings