Locations
Locations in the Settings area stores locations relevant to Incidents and Claims. Locations that may be stored here could include office or other company locations or client locations where incidents commonly occur.
The Cost Centre area can be found under Settings on the Navigation Bar. Users with access to Cost Centre settings can edit, view and add Cost Centre information in this area.
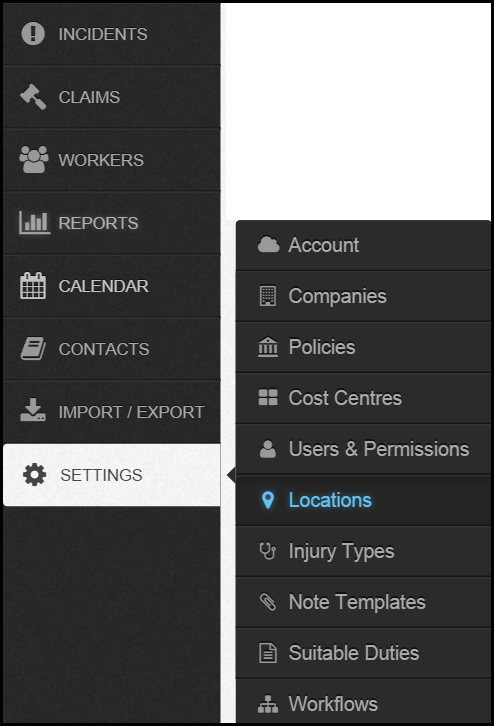
Tabs
There are two tabs: Current & Archived.
When a new location is added it will show in the Current tab.
Locations can be moved to the Archived tab at any time. The purpose of the Archived tab is to show locations that are no longer required, for example locations that are no longer used the company.

Summary of Location
The list of the locations including the location name and address. Locations are ordered alphabetically by the location name.
If locations are company specific they will be ordered alphabetically under the company it is assigned.
Edit
The edit button can be found on the right-hand side of the location name.

Select this button to edit or add additional details to a location already in the Injury Master system. 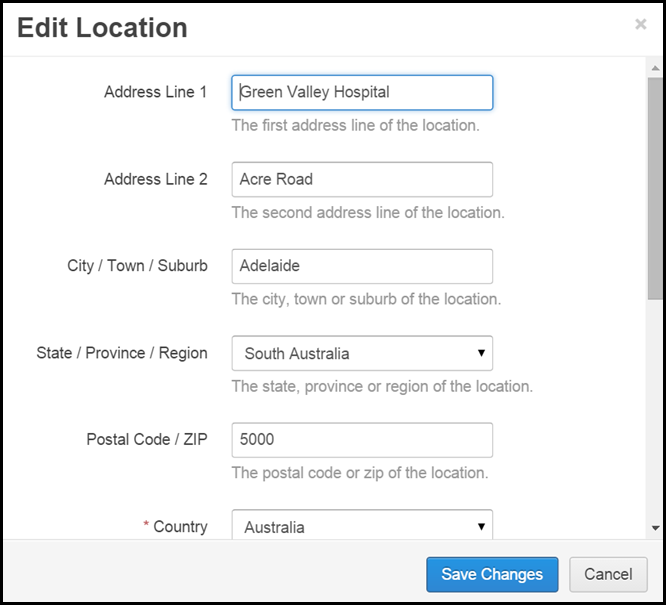
Archive locations
The edit button can be found on the right-hand side of the location name.

By selecting the archive button the location can be moved into the archived tab. This is useful for locations that are no longer used (closed sites, for example).
Locations can be moved back into the Current tab at any time.
When a location is moved into archive tab the user then has the option to delete from the system. Please note that if a location is deleted it will remain assigned to incidents/claims it had previously be assigned but the location can not be assigned to any further incidents/claims.
Search
Search all locations by entering all or part of the locations name into the search box on the right-hand side. Only locations matching the search criteria will show.

Add a Location
- To add a location to the system in the Loactions area select the Add Location button, the blue button on the right-hand side.

- A pop-up will appear, complete fields and select Add.
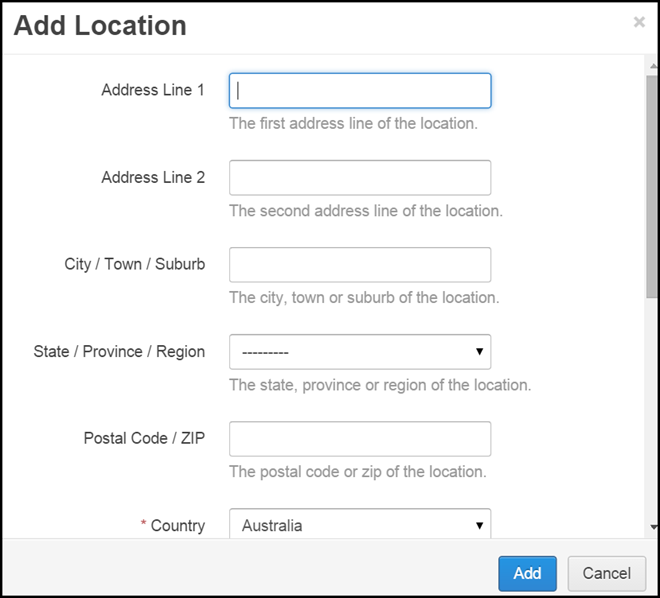
- The Location will then be added to the Injury Master system.
Enable Company Specific Locations
When Locations are added to the system the default settings in Injury Master make the Locations available for selection by all companies within the organisation.
Locations can however be company specific.
To have company specific Locations select the arrow next to Add Locations and select the drop-down option: Enable Company Specific Locations.
On the side of the Add Location button there is an arrow which produces a drop-down option to: Enable Company Specific Locations.

This enables the Location settings to be changed.
A pop up will appear, as shown below, and select from three options:
- Allow users to assign Locations to companies - this will enable company specific locations to be added by users
- Allow users to assign Locations to master companies only - this will enable users to add locations to master companies
- Locations should be available to all companies
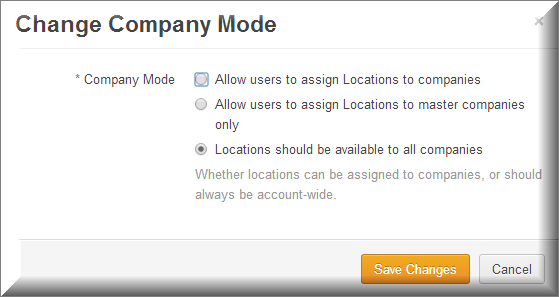
Change the Mode for the Locations and select save changes.
Other ways to Add a Location
A new location can be added to the Injury Master to the system under the Edit Incidents, Edit Claims tab and when generating certain documents under the Generate Documents Tab.
Edit Incident/Edit Claims
A new location can be added to the system in the Incidents Details section under the Edit Incident/Edit Claim tab with an Incident/Claim.
To do this select the + button on the right-hand side, as shown below and the Add Location pop up will appear.
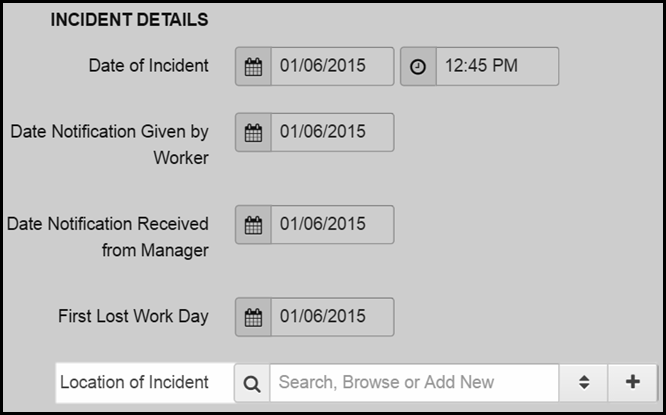
Complete the fields and select add. This will then be added to the Incident/Claim and the Locations area.
Generate Documents
New Locations can be added when generating certain documents, such as Return to Work plans.
Under the Locations section of the document the widget drop down will provide the option to Create a New Location.
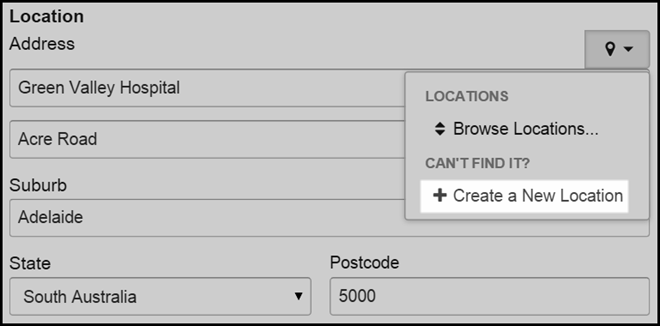
Select this option to produce the Add Location pop up to add the new location to the Injury Master system.
 Injury Master
 Claims Master
 Premium Master
 Data Master
 Master Apps