Dashboard
To view the full information of an Incident select the View button located to the right of the incident summary.

Once selected you will be directed to the Incidents Full View page, as shown below. 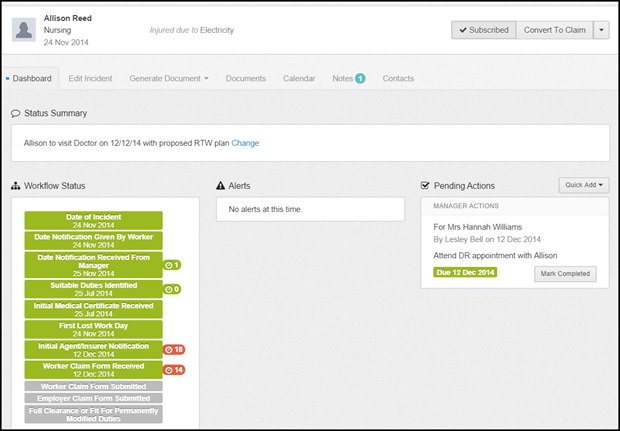
Each tab contains information relating to the incident. The dashboard is the first tab you will see when viewing the incidents full data.
The dashboard has the following features, all can be seen in the image above:
Status Summary
This is a free text box where the user enters a brief summary of the current status of the incident.
You can update the status summary by selecting change button.

Workflow
The workflow feature allows you to see the status of an incident broken down by the steps of the incident process and highlights the next step in the process.
The workflow status can be seen on the dashboard page of the individual incident.
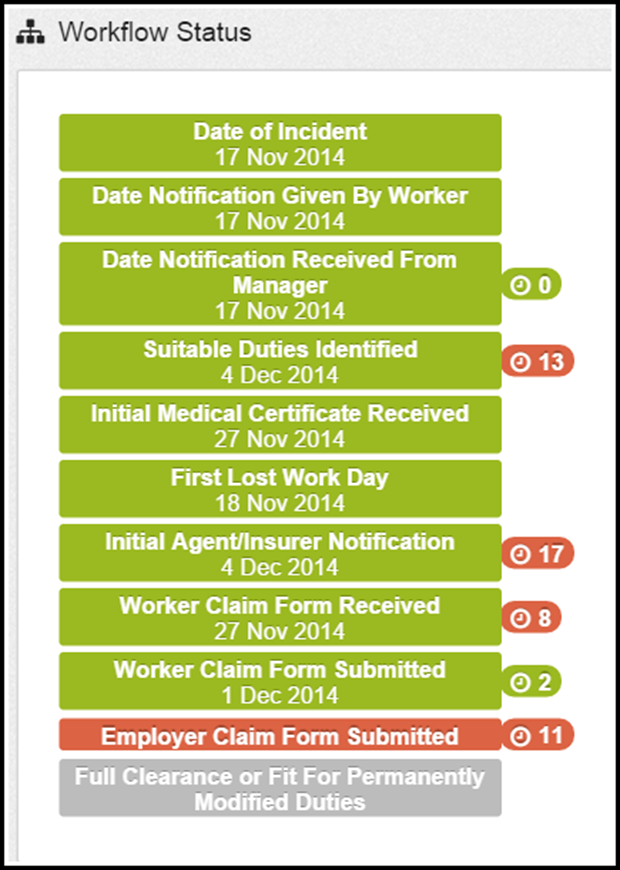
It is an effective tool that summarises the incident status as well as how responsive the relevant parties have been in the process. The workflow is based on stages and targets.
As you can see from the image above the workflow status is colour coded in a traffic light system showing the steps:
- Complete - Green
- Due for completion - Orange
- Overdue steps - Red
The workflow feature also allows you to complete each step by clicking on the step. For example, by selecting Date Notification Given By Worker a pop up will appear (as shown below) allowing you to input the relevant date.
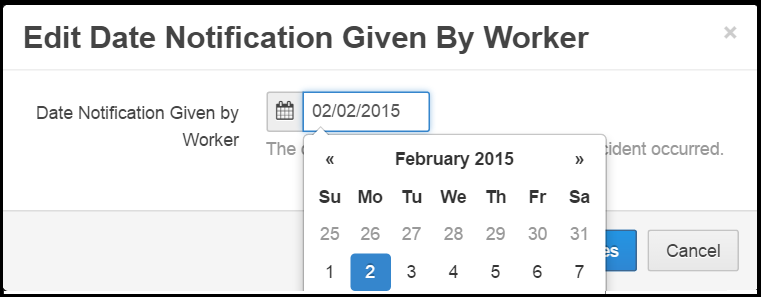
The workflow feature activates the alerts function, please see Alerts section below.
For more information regarding Workflow please refer to the Settings area.
Alerts
Alerts are items/tasks due for completion such as workers medical certificate due to be updated or overdue.
Alerts for the incident will show on the dashboard.
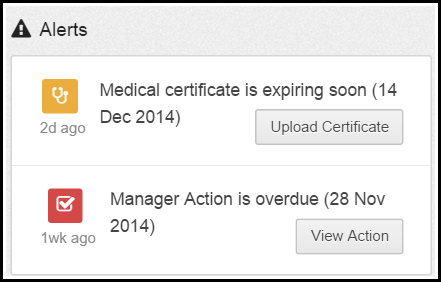
These alerts will also show in your Inbox and you will receive the alerts via email.
Pending Actions
Actions are reminders and notes set by users for action that require completion.
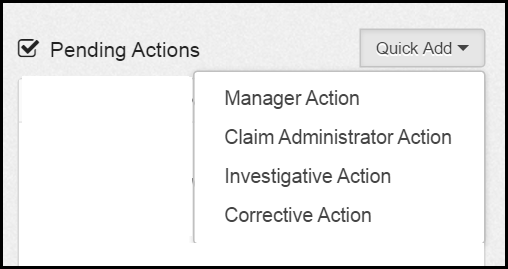
There are four action types:
- Managers Actions
- Claims Administrator Actions
- Investigative Actions
- Corrective Actions
The latest actions are summarised for the incident are summarised on the dashboard.
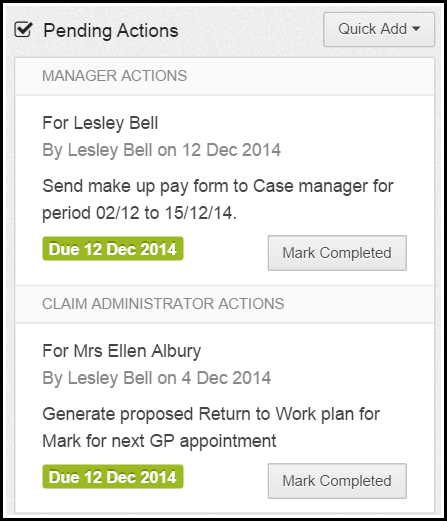
Pending actions can also be found in the Inbox and send via email to the user or contact assigned to the action.
Quick Add Actions
Actions can be added using the Quick Add button on the Dashboard or under the Notes tab.
- By selecting the Quick Add button a drop down list will appear. Select from the list.
A pop up will then appear containing the following field:
Content - A default list of templates is available using the drop down or the user may free type into the contents field.
Actions require additional details.
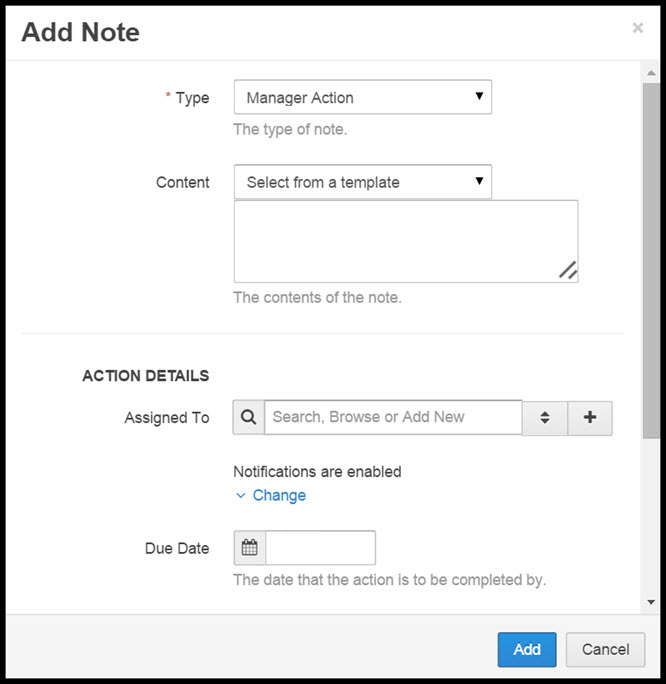
Assigned To - enter the name of the user. Begin typing into the field and matching options will appear in a drop down below.
If left blank as the user adding the action will automatically be assigned.
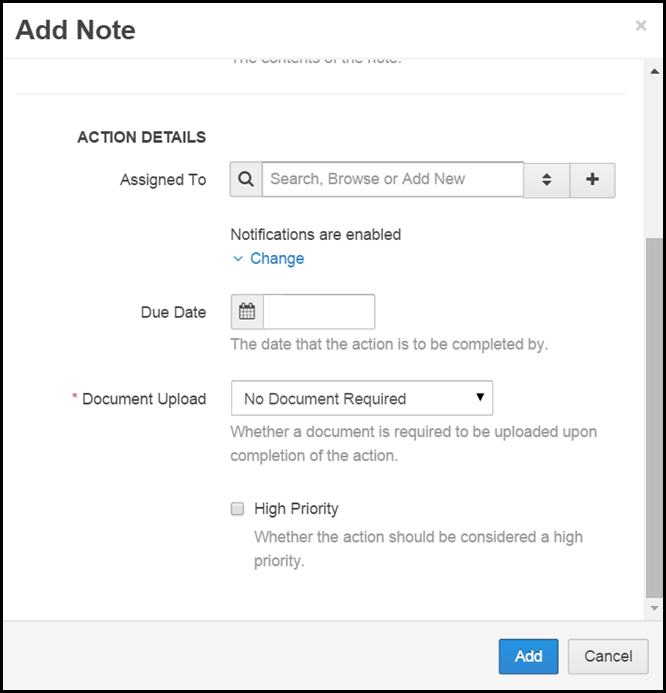
Notifications - Actions are automatically set to enable notification to be sent the user/contact via email. This can be disable by deselecting the tick box.
Due Date - select the date the action is to be completed by.
Document Upload - the drop down enables you to set whether a document is required to be uploaded upon completion of the action
High Priority - select this box if you wish the action to be highlighted as a High Priority.
The Action will then be reflected in the Notes area, in the Pending Actions on the dashboard and on the Calendar.
For more information on Alerts and Actions please see the following articles:
 Injury Master
 Claims Master
 Premium Master
 Data Master
 Master Apps