 Injury Master
 Claims Master
 Premium Master
 Data Master
 Master Apps
Adding an Incident
New Incidents can be added in the following ways:
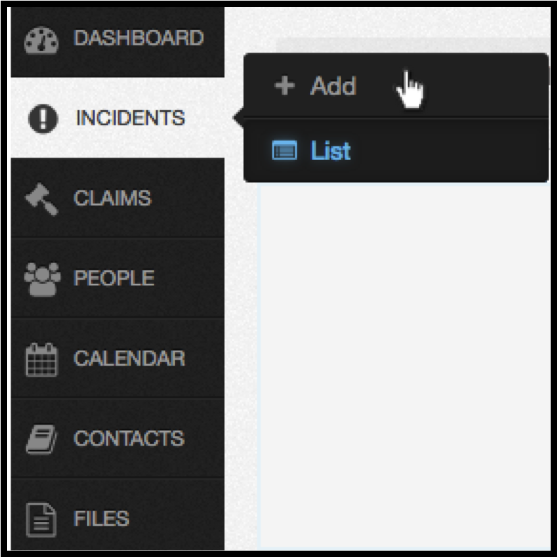
Option 1
1. Select INCIDENTS on the navigation bar
2. Select + Add from the menu that appears.
Option 2
1. Select INCIDENTS on the navigation bar
2. Select List from the menu that appears
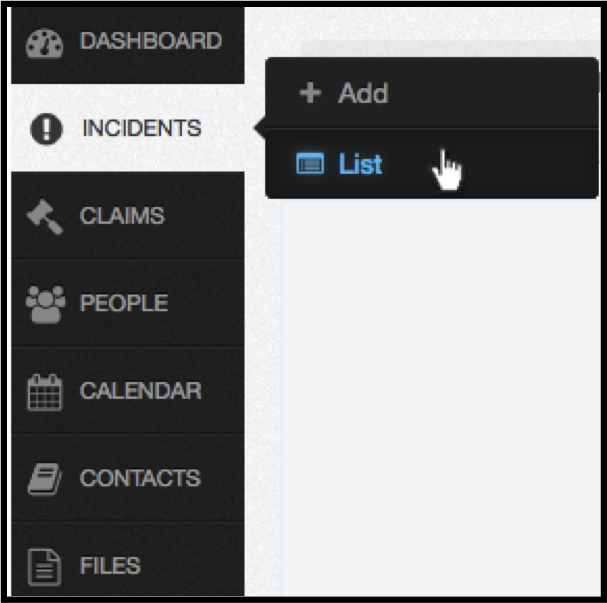
3. Click the blue Add Incident button on the right-hand side of the screen.
Both Option 1 & Option 2 will then direct you to the Add Incident page, as shown below. Complete the information required and save. You can edit and add to this information at any stage.
Selecting the Incident Type
There are six Incident Types:
- Injury or Illness (default)
- Hazard*
- Property Loss or Damage*
- Environmental Damage*
- Harassment/Bullying
- Criminal Act*
- These Incident types are to be assigned to a site location (not a person).
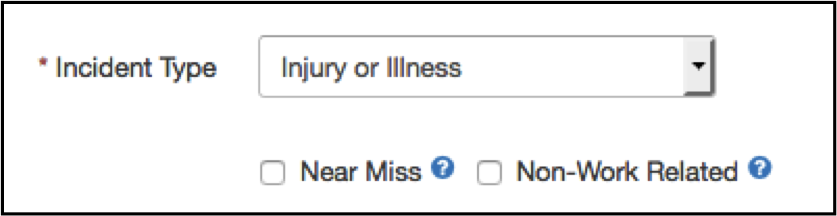
Flags:
Near Miss - incidents that didn't actually occur but almost did.
Non-Work Related - an incident/injury that did not occur at work but is being recorded.
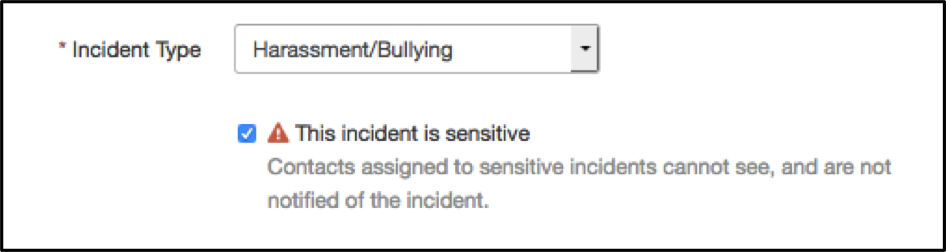
Harrassment & Bullying
When selecting this as the Injury Type, This incident is sensitive flag will automatically be selected. This flag means that contacts assigned to the incident cannot see, and are not notified of the incident. This flag can be deselected if preferred.
Person
For person-related incidents*, the worker associated with the incident must be selected.
*Injury or Illness, Harassment/ Bullying
Search Person
Use the search field box to check if a person is already in the system (Begin typing in the text field and a drop down of matching options will appear to select from).
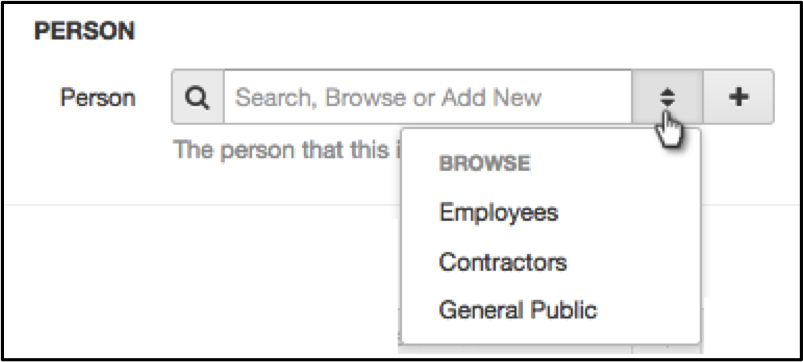
Browse Person
- Select the arrows button next to the text field to produce a drop-down list.
- Select the person type: Employee, Contractor or General Public.
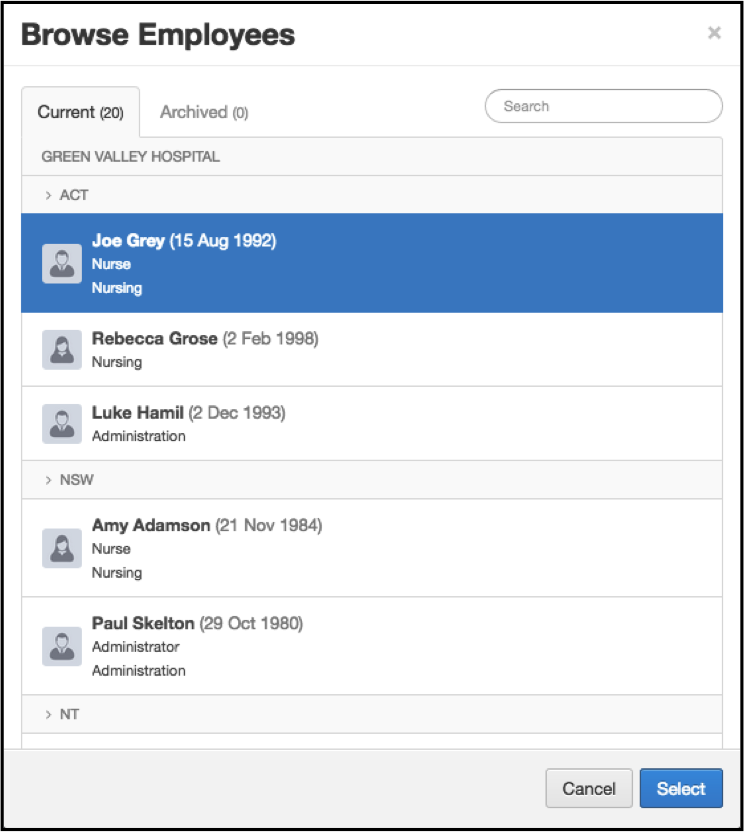
- Select from the pop up containing a list of people already in the system.
There is a search box on the right-hand side.
Please note there are two tabs: Current and Archived.
Add a New Person
- Add a new worker by selecting the + button next to the person search bar.
- Select the person type: Employee, Contractor or General Public
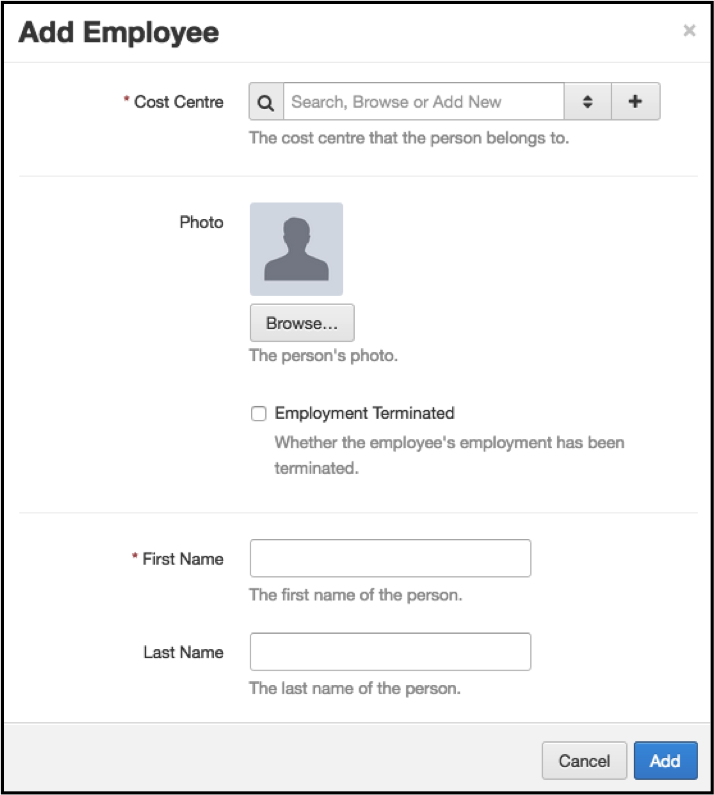
Complete the fields in the pop up and select Add
When a new person is added to the system they will also be visible in the Contacts area.
Cost Centre
Select the worker’s company cost centre. The cost centres are already in the system.
If the cost centre you require is not in the system and you are not an Administrator, please contact someone with Administrative access who can add and amend cost centres under the Settings area.
You can select the cost centres by either:
- Selecting the two arrows next to the text field and select from the list, or
- Begin typing in the text field and a drop down of matching options will appear to select from.
Assign to
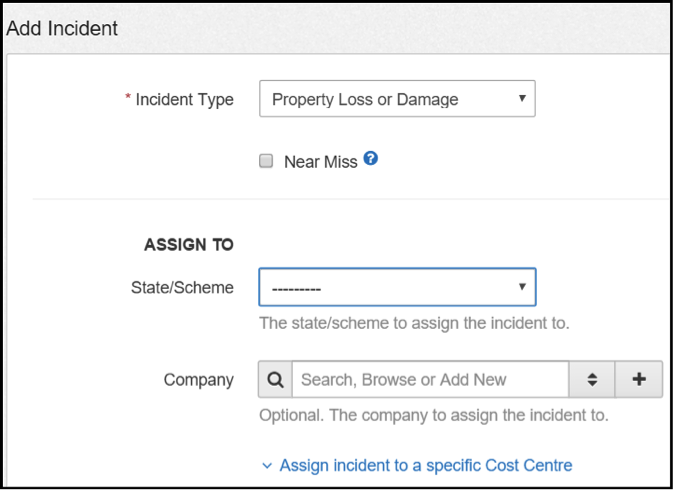
For non-person related incident types*, the person field will no longer be visible and instead an Assign To section will appear.
*Hazard, Property Loss or Damage, Environmental Damage, Criminal Act.
State/Scheme – select from the drop-down box
Company – begin typing the company name in the text field and a drop down of matching options will appear to select from. Alternatively select browse button (two arrows) and search the list.
If the incident cannot be assigned to a single company, this field can be left blank.
Contacts
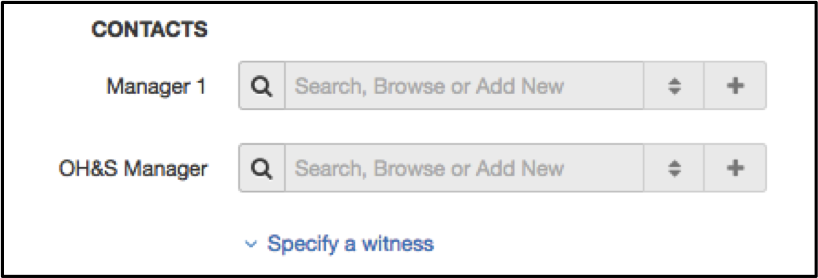
Manager
If the managers contact details are already in the system you can either:
- Select the two arrows next to the text field and select from the list, or
- Begin typing in the text field and a drop down of matching options will appear to select from, or
To enter a new manager:
- Select the + button next to the field and complete the fields in the pop up. The manager will then be added to the Contacts area so they can be assigned to other incidents and/or claims in the future.
OH&S Manager
If the OH&S managers contact details are already in the system you can either:
- Select the two arrows next to the text field and select from the list, or
- Begin typing in the text field and a drop down of matching options will appear to select from, or
To enter a new manager:
- Select the + button next to the field and complete the fields in the pop up. The OH&S manager will then be added to the Contacts area so they can be assigned to other incidents and/or claims in the future.
Specify a Witness
If the reporter has details regarding a witness, click on Specify a witness to produce an extra field.
Enter the witness' details either by using the search box or select the + button next to the field and complete the pop up. Further witnesses can be added if required.
Incident Details

Date of Incident
Select the Date & Time of the Incident.
Select the Date that the incident was first reported.
Specify More Dates
Click on Specify more dates to enter additional details regarding the incident such as the date the manager reported the incident and the first work day lost.
By selecting this option further fields will appear, as shown below, which you have the option to complete.
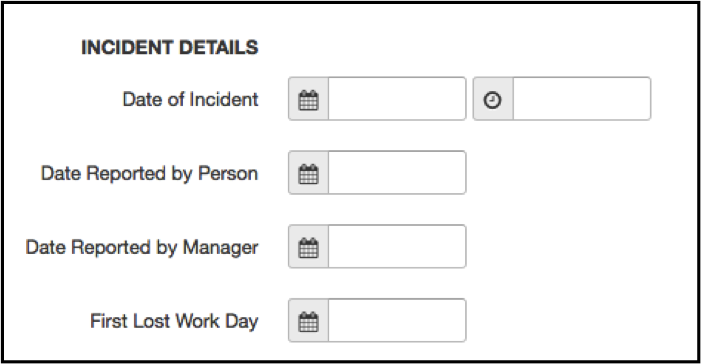
Although these are optional fields, it is important to complete the fields that you have information for.
Location of Incidents
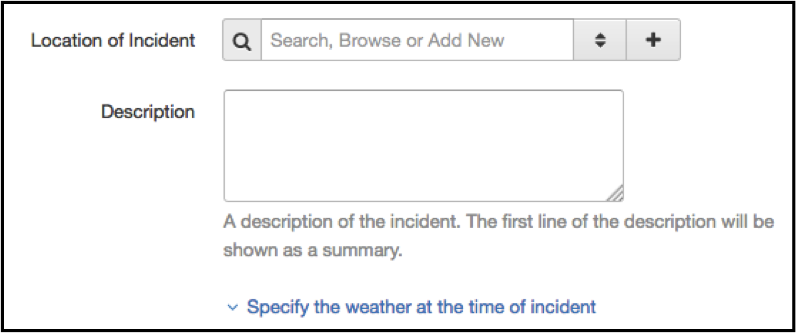
Enter the location where the incident took place. If the location details are already in the system you can begin typing in the text field and a drop down of matching options will appear to select from, or to enter a new location select the + button next to the field and complete the pop up. The location will then be added to the Locations area (under settings) so they can be assigned to other incidents and/or claims in the future.
Description
A brief description of the incident can be added. This line of text will appear under the worker’s name in the incident summary list.
Weather at time of Incident
If the reporter has details regarding the weather at the time of the incident click on Specify the weather at the time of incident to produce two extra drop-down fields.
Select the option/s that most closely match.
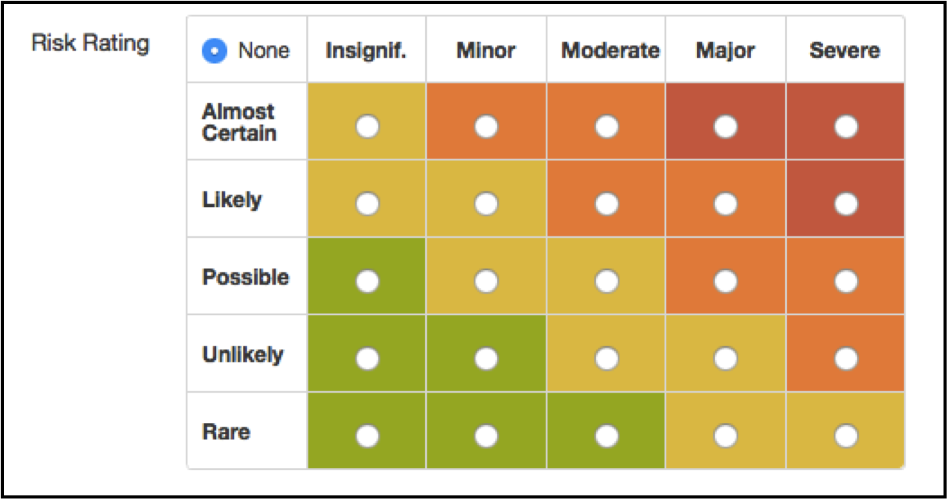
Risk Rating
This is a table showing the risk rating given to the incident.
The risk rating defines the severity of the incident (horizontal) and the likelihood of it occurring or reoccurring (vertical).
Injury Details
Although the following fields are optional it is recommended that they are completed so that you have as much information as possible in the system.
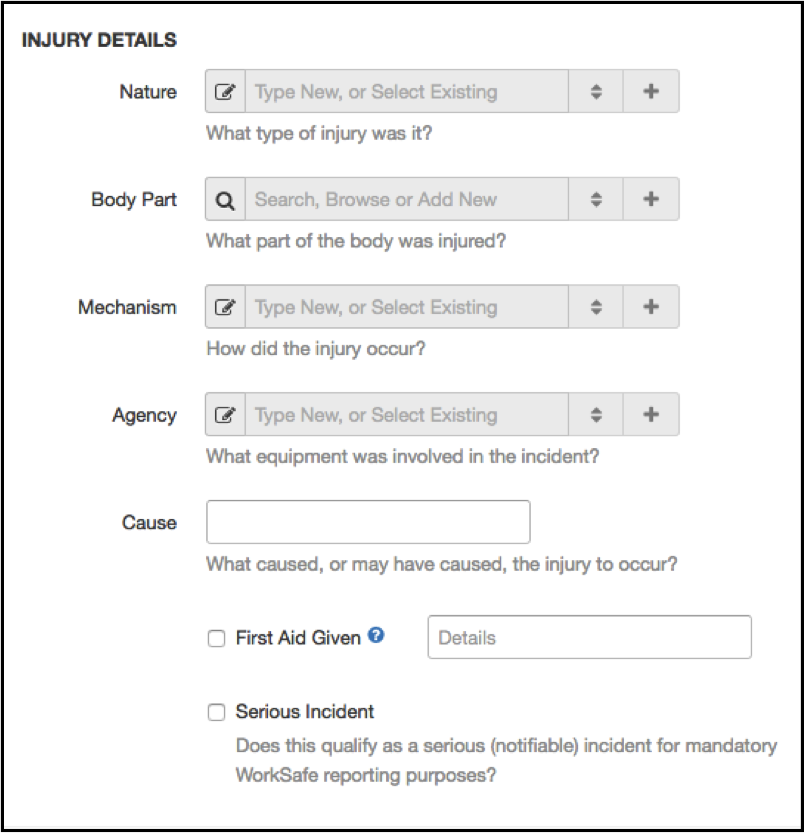
Nature - Select the type of injury by either:
- Typing in the text field and a drop down of matching options will appear to select from.
- Selecting the two arrows next to the text field and find the description that is the closest match
Mechanism - Select how the injury occurred by either:
- Typing in the text field and a drop down of matching options will appear to select from.
- Selecting the two arrows next to the text field and find the description that is the closest match
Body Part - Select what body part was injured by either:
- Typing in the text field and a drop down of matching options will appear to select from.
- Selecting the two arrows next to the text field and find the description that is the closest match
Agency – Select which equipment was involved in the incident by:
- Typing in the text field and a drop down of matching options will appear to select from.
- Selecting the two arrows next to the text field and find the description that is the closest match
Cause
A free text box to input a description of what caused the injury to occur.
First Aid Given
Select this box if you know the incident required first aid and give details on what was administered.
Serious Injury
Select this box if the incident qualifies as a serious/notifiable injury as specified by WorkSafe or relevant legislation.
Flags
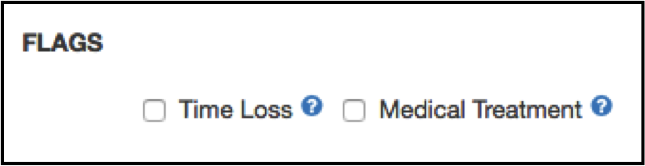
Extra flags can be selected if you know the incident has resulted in time loss from work or medical treatment.
Please see Flags for more information.
Once you select Save Changes, the incident will be created and you will be directed back to the incident’s dashboard page.
*If you have administrative access, you can adjust which text fields are visible within the incident form and which fields must be completed. For more information on Visibility settings see the Account Settings article*