 Injury Master
 Claims Master
 Premium Master
 Data Master
 Master Apps
Return To Work Plans
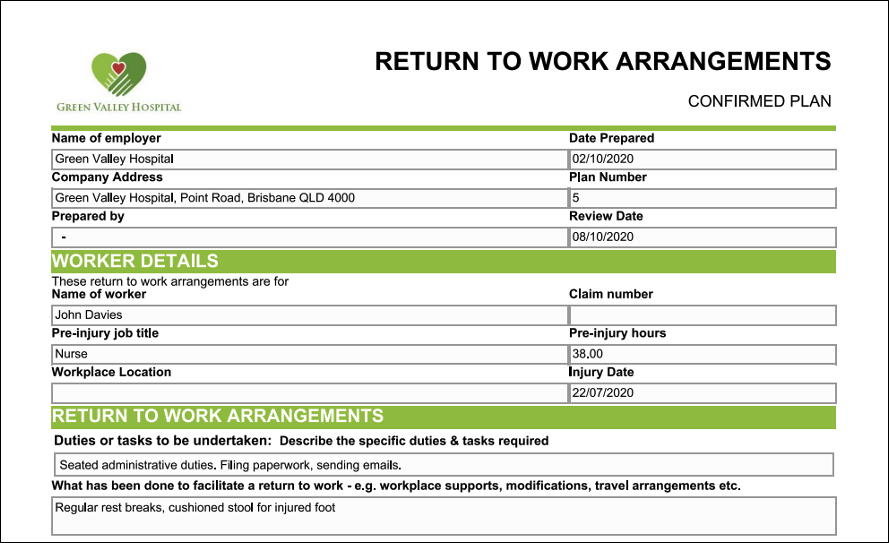
Injury Master provides an electronic Return To Work Plan to assist in your compliance of your obligations as a Return To Work Coordinator. RTW Plans can be uploaded or generated as a Smart Form. Smart RTW Plans interact with the system in a number of ways, and a PDF version can be viewed / printed from the Download button.
VIEWING RTW PLANS
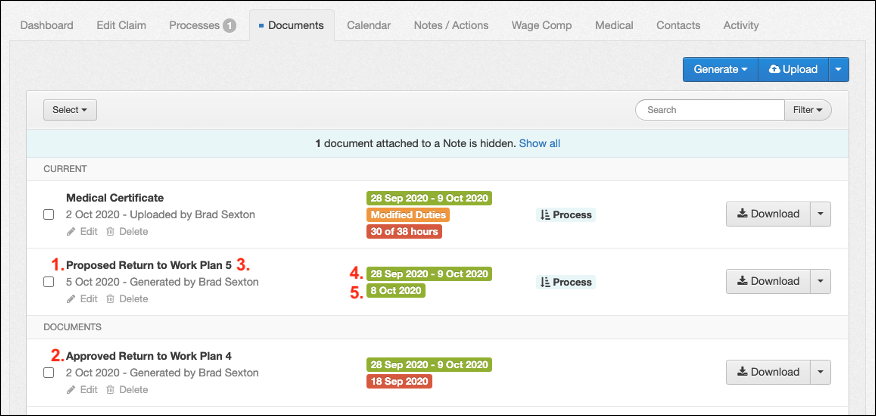
RTW Plans are stored in the Documents area of Incidents / Claims. The current or most recent RTW Plan is displayed at the top of the Documents library under the CURRENT heading, along with the most recent Medical Certificate. By default, RTW Plans override the Filter which hides Documents linked to Processes.
RTW Plans include the following information:
- Proposed Status – Defaults to Confirmed. Handled differently by the system.
- Approved Status – When all signatures / approvals are received
- Plan Number – Defaults to 1 more than previous RTW Plan, but can be customised
- Start Date – End Date – (Current / Expired) – Time period plan applies to
- Review Date / Final – (Future / Past) – Determines RTW Plan Expired Alert. No alert when set as Final.
Each of these fields are determined when Generating or Uploading a RTW Plan.
UPLOADING RTW PLANS
RTW Plans can be uploaded like any other Document Type. Select Upload from the Documents area and select Return to Work Plan as your Type. This will open up extra options for completion which correspond to the above fields.
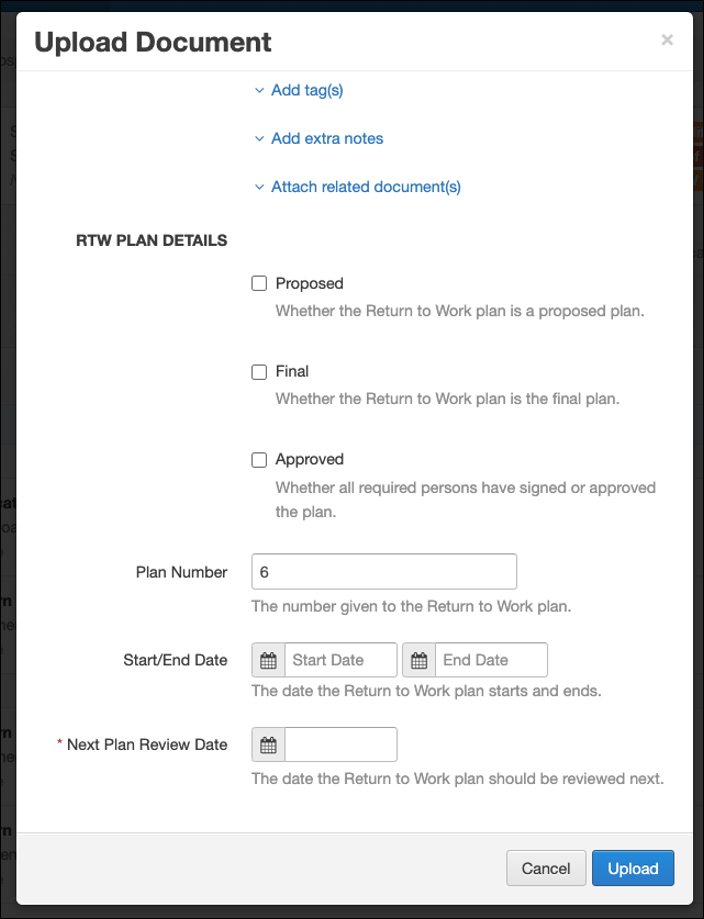
Ticking the Proposed box removes the Final / Approved boxes, and ticking the Final box removes the Next Plan Review Date.
These details can be later edited by selecting Edit below the Document Title.
GENERATING RTW PLANS
RTW Plans are generated like other Smart Forms, by selecting Generate from the Documents area and selecting Return to Work Plan. Within the RTW Plan you are prompted to set above fields. Some fields are auto-completed from system information, and others are completed through widgets or signature boxes.
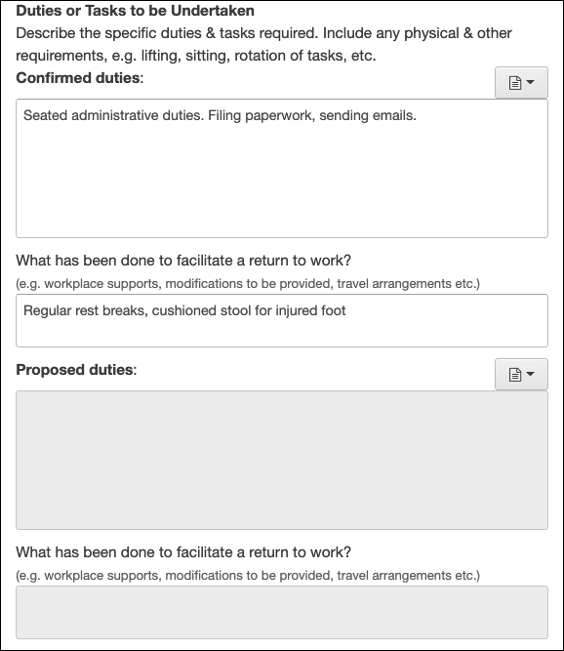
Confirmed / Proposed
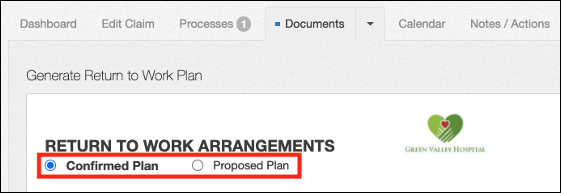
The Return To Work section includes a Confirmed duties and Proposed duties box. Only the option you select is available for completion, but previous plans of either type will auto-populate the suitable duties accordingly.
Plan Number

Start / End / Review Dates
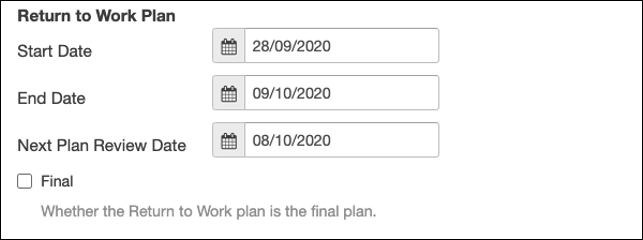
Start Date and End Date default to the Start and End date of the most recent Med Cert. Ticking the Final box removes Next Plan Review Date fields and marks document as Final in place of the Review date.
Widgets
Widgets are buttons within the RTW plan which allow for the selection of choices from IM libraries rather than manually typing. The widgets in the RTW Plan include:
- Prepared By – Contacts (RTW Coordinators / OH&S Managers) / Users
- Return to Work Coordinator – Contacts (RTW Coordinators) / Users
- Location – Locations
- Confirmed / Proposed Duties – Suitable Duties
- Company Address – Locations
- Supervisor – Contacts (Managers) / Users
- First / Second Doctor or Healthcare Provider – Contacts (All Doctor Types)
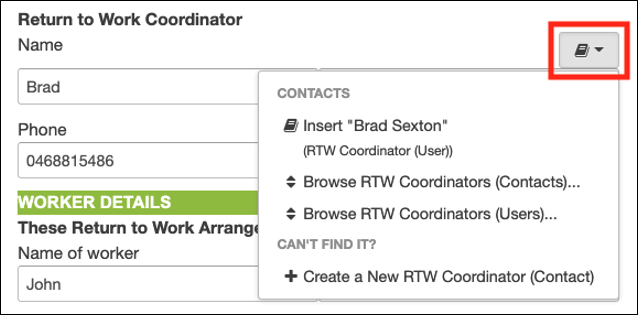
The icon on each widget corresponds to the related library. Select the widget to reveal which options you can select.
- CONTACTS / LOCATIONS / SUITABLE DUTIES
- Insert – quick-select primary contact on Incident / Claim
- Browse – whole library
- CAN’T FIND IT?
- Create – add new option to library
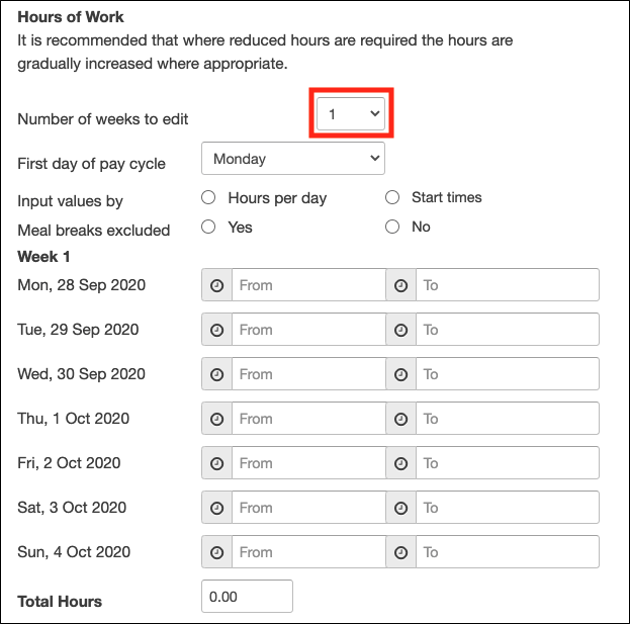
Hours of Work
You can specify the working hours of the RTW plan by selecting Number of weeks to edit (up to 4). This opens extra information to complete regarding the rostered hours of the worker’s week. RTW Plans with Hours of Work specified become 2-page PDFs instead of 1-page.
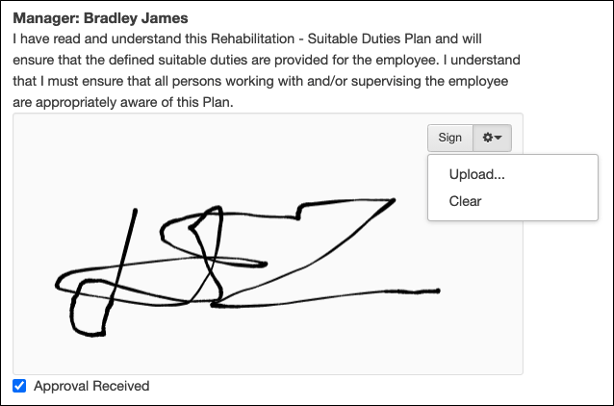
Signature Boxes / Approved Status
The Approved status of the RTW Plan is set by either ticking the Approval Received boxes or adding a signature to the Worker, RTW Coordinator and Manager Declarations. Signature can be added in one of 3 ways:
- Free-drag the mouse in the signature box
- Select Sign if you have added a signature to your profile
- Select Upload in the gear options to select file from your desktop
You can also clear you signature from Clear in the gear options.
The Name and Declaration of the Worker, Return to Work Coordinator and Supervisor can also be customised from SETTINGS --> Account --> Documents tab.