 Injury Master
 Claims Master
 Premium Master
 Data Master
 Master Apps
Setting Up Single Sign-On Authentication
Injury Master has support for Single Sign-On (SSO) via the SAML 2.0 standard.
Prerequisites
You must provision your own third-party SAML 2.0 identity provider for use with this feature before you can enable SSO on your account.
Setting Up Your Identity Provider
Injury Master supports identity providers that utilize the SAML 2.0 specification, such as Shibboleth and Active Directory Federation Services (ADFS) and Azure Active Directory.
The identity provider must be configured to trust the Injury Master service provider (sometimes called a 'relying party').
Most commonly this is performed by importing the service provider's (in this case Injury Master's) metadata XML into your identity provider.
Active Directory Federation Services (Windows Server 2008 R2 - Window Server 2022)
Step 1. Metadata
The metadata XML describes the endpoints, certificates and bindings that the Injury Master service provider supports.
Injury Master's SAML 2.0 metadata XML can always be found at the following URL:
https://www.injurymaster.com.au/saml2/metadata/
It is best practice to register this URL with your identity provider in order to always have the latest values if things change, rather than performing a once off import or configuring manually.
Enabling TLS 1.2 on an ADFS Server
Injury Master uses TLS 1.2 and TLS 1.3 for secure communication with our application. Unfortunatately all versions of Windows Server (2022 and ealier) require TLS 1.2 to be enabled before metadata retrieval can occur. To enable TLS 1.2 enter the following commands into Power Shell as the Administrator user:
New-Item 'HKLM:\SYSTEM\CurrentControlSet\Control\SecurityProviders\SCHANNEL\Protocols\TLS 1.2\Client' -Force | Out-Null
New-ItemProperty -path 'HKLM:\SYSTEM\CurrentControlSet\Control\SecurityProviders\SCHANNEL\Protocols\TLS 1.2\Client' -name 'Enabled' -value '1' -PropertyType 'DWord' -Force | Out-Null
New-ItemProperty -path 'HKLM:\SYSTEM\CurrentControlSet\Control\SecurityProviders\SCHANNEL\Protocols\TLS 1.2\Client' -name 'DisabledByDefault' -value 0 -PropertyType 'DWord' -Force | Out-Null
New-ItemProperty -path 'HKLM:\SOFTWARE\Microsoft\.NetFramework\v4.0.30319' -name 'SchUseStrongCrypto' -value '1' -PropertyType 'DWord' -Force | Out-Null
Example: Importing Metadata for ADFS 2.0 on Windows 2008 R2
- Open the ADFS 2.0 Management Console.
- Under Trust Relationships > Relying Party Trusts, select "Add Relying Party Trust..".
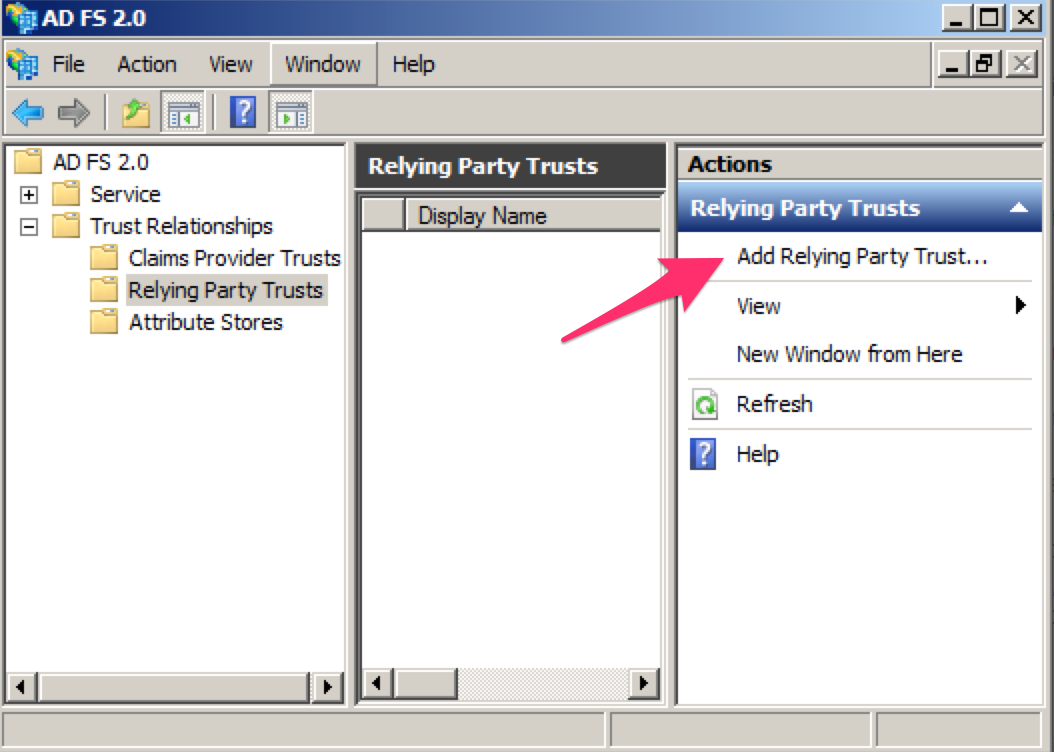
- The Add Relying Party Trust Wizard will appear. Click "Start" to continue.
- Enter IM's metadata XML into the "Federation metadata address".
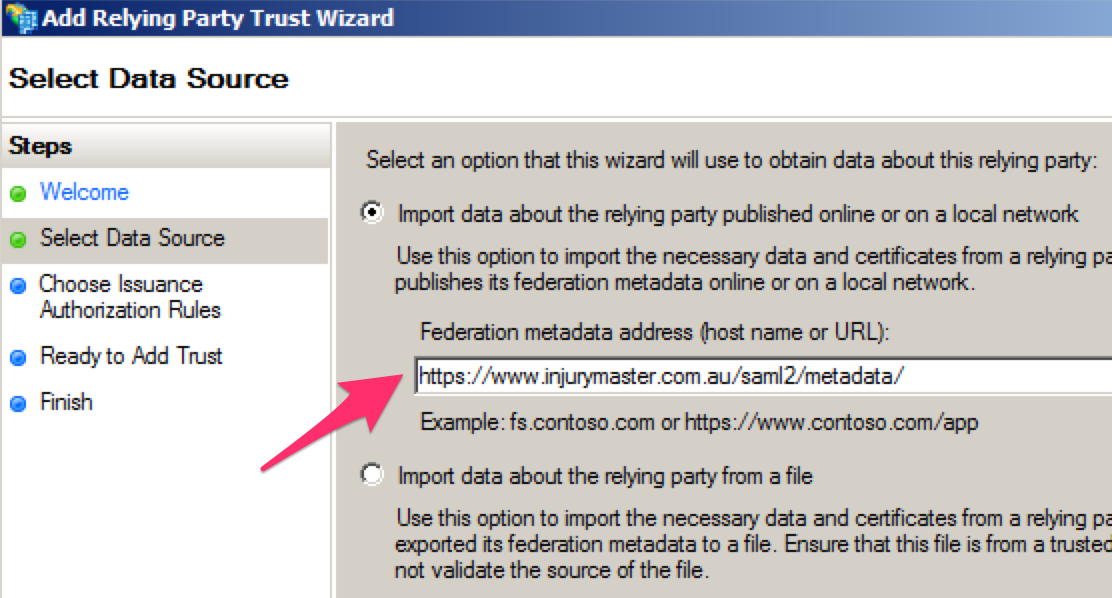
- Click "Next" for all remaining dialogs of the Wizard.
Step 2. Name Identifier
Injury Master's SAML 2.0 service provider supports the following common Name ID types:
- Email Address (urn:oasis:names:tc:SAML:1.1:nameid-format:emailAddress)
- Persistent (urn:oasis:names:tc:SAML:2.0:nameid-format:persistent)
- Transient (urn:oasis:names:tc:SAML:2.0:nameid-format:transient)
You can select which type you wish to use in the SSO provider settings (see below in Setting Up Injury Master).
Regardless of the Name ID you wish to use, Injury Master must always be provided with the email address of the user (if not via Name ID, then via attributes, see the Identity Attributes section below). This will be used to link to the correct user account within Injury Master.
Example: Using a Email Address Name ID for ADFS 2.0 on Windows 2008 R2
- Open the ADFS 2.0 Management Console.
- Select the Injury Master relying party and click "Edit Claim Rules...".
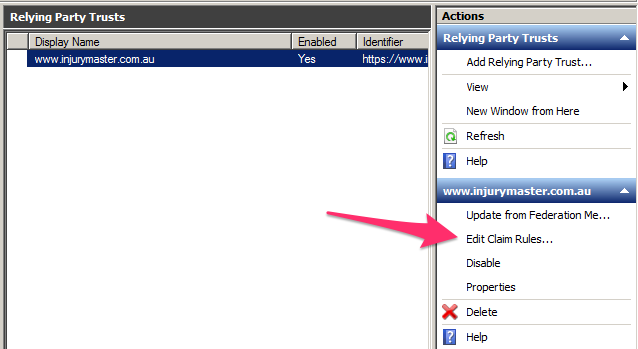
- On the "Issuance Transform Rules" tab, click "Add Rule...".
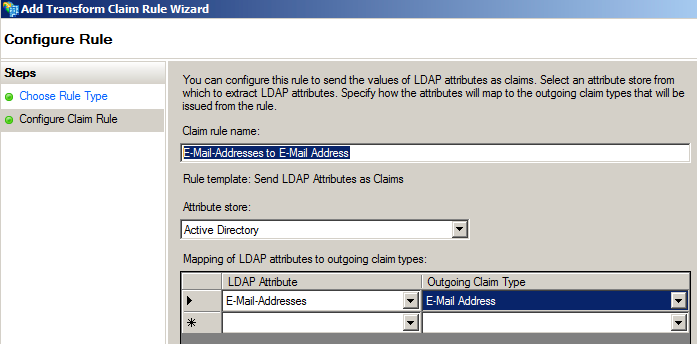
- Select "Send LDAP Attributes as Claims" and click "Next >".
- Name the rule "E-Mail-Addresses to E-Mail Address", select the attribute store as "Active Directory", map "E-Mail-Addresses" to "E-Mail Address" and click "Finish".
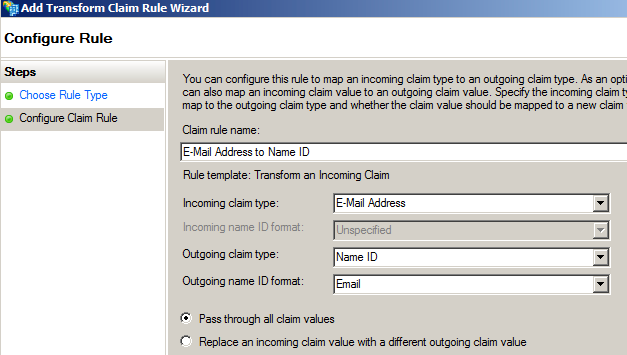
- Click "Add Rule..." again and select "Transform an Incoming Claim" and click "Next >".
- Name the rule "E-Mail Address to Name ID", select "E-Mail Address" as the incoming claim type, "Name ID" as the outgoing claim type, "Email" as the outgoing Name ID format and click "Finish" to add the rule.
Example: Using a Persistent or Transient Name ID for ADFS 2.0 on Windows 2008 R2
Follow the steps outlined at the following MSDN blog:
http://blogs.msdn.com/b/card/archive/2010/02/17/name-identifiers-in-saml-assertions.aspx
Step 3. Identity Attributes
Identity Attributes (sometimes called 'claims') are attributes that are provided to Injury Master when the user logs in.
Injury Master makes use of the following attributes:
Email Address
Can be one of the following:
- mail (urn:oid:0.9.2342.19200300.100.1.3)
- email (urn:oid:1.2.840.113549.1.9.1.1)
- email (urn:mace:dir:attribute-def:email)
- emailAddress (http://schemas.xmlsoap.org/ws/2005/05/identity/claims/emailaddress)
- emailAddress (urn:mace:dir:attribute-def:emailAddress)
Important: The email address is required when using a Persistent or Transient Name ID
First Name
Can be one of the following:
- givenName (urn:oid:2.5.4.42)
- givenName (http://schemas.xmlsoap.org/ws/2005/05/identity/claims/givenname)
- givenName (urn:mace:dir:attribute-def:givenName)
- gn (urn:mace:dir:attribute-def:gn)
Last Name
Can be one of the following:
- sn (urn:oid:2.5.4.4)
- sn (urn:mace:dir:attribute-def:sn)
- surname (http://schemas.xmlsoap.org/ws/2005/05/identity/claims/surname)
- surname (urn:mace:dir:attribute-def:surname)
Example: Providing Email and Name attributes as a Claim for ADFS 2.0 under Windows 2008 R2
- Open the ADFS 2.0 Management Console.
- Select the Injury Master relying party and click "Edit Claim Rules...".
- On the "Issuance Transform Rules" tab, click "Add Rule...".
- Select "Send LDAP Attributes as Claims" and click "Next >".
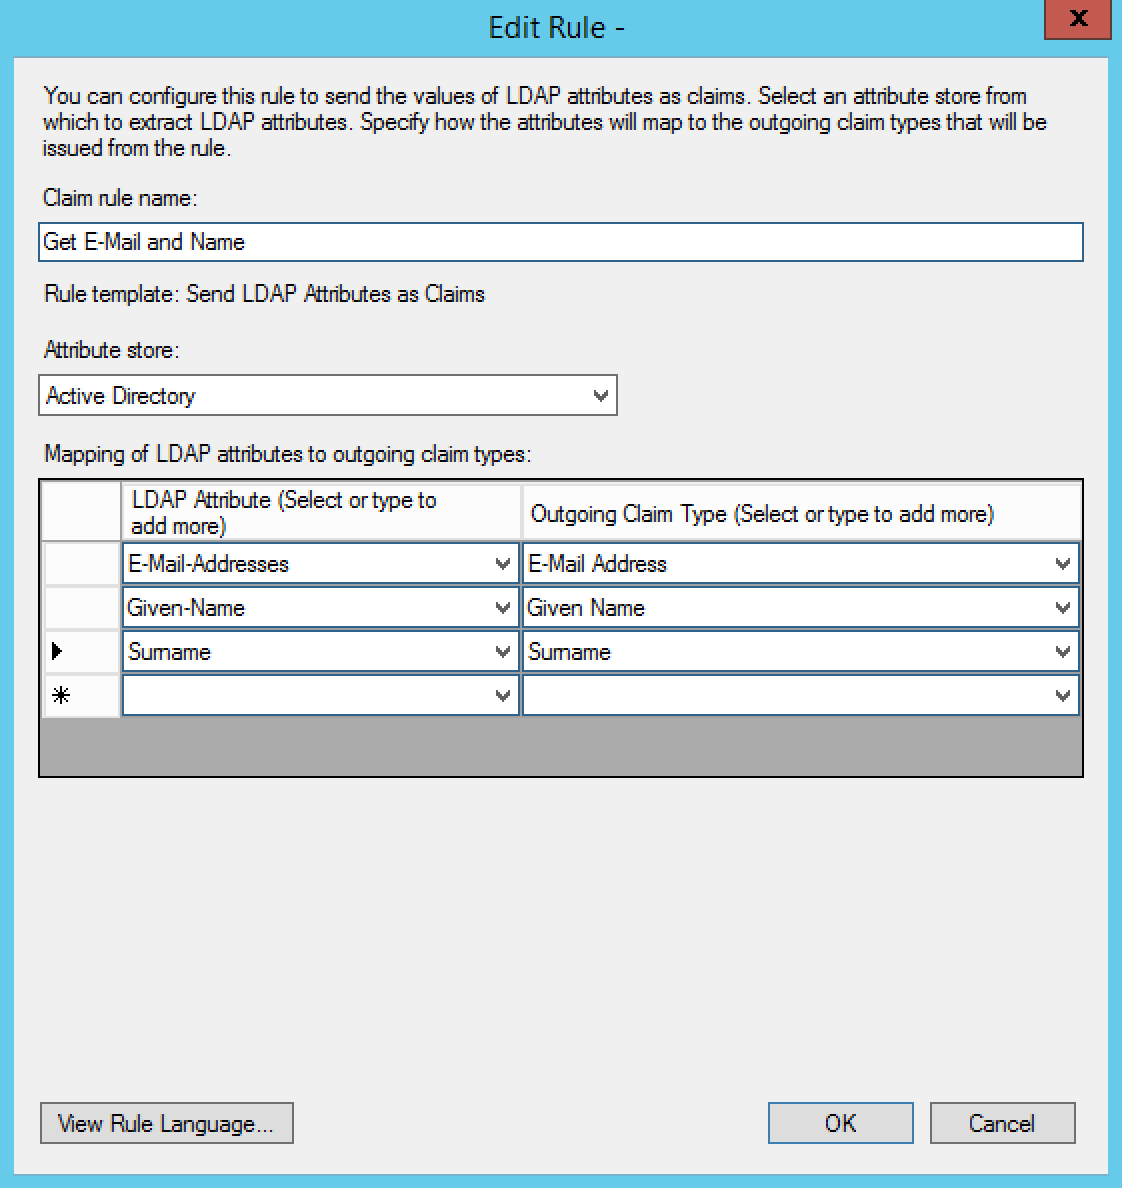
- Name the rule "Get E-Mail and Name".
- Assign the following LDAP attributes to the following Claim Types and then click "OK":
- E-Mail-Adressess -> E-Mail Address
- Given-Name -> Given Name
- Surname -> Surname
Step 4. (Optional) Single Log Out Query String Fix for ADFS 2.0 under Windows 2008 R2
If you are using anything other than ADFS on Windows Server 2008 R2 then you can skip this step.
IIS has an issue with the length of the Single Log Out (SLO) SAMLRequest query string. You can fix it by following the steps outlined in this guide:
Setting Up Injury Master
After your identity provider has been configured, the next step is to configure Injury Master itself.
Step 1. Enabling Single Sign On
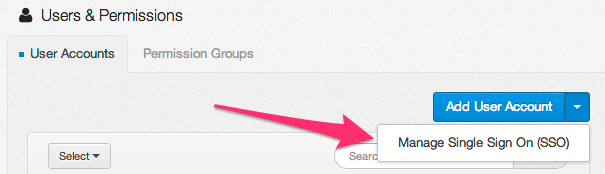
To enable Single Sign On, log in with an Administrator account and go to Settings > Users & Permssions.
Click on the more drop down on the "Add User Account" button and select "Manager Single Sign On (SSO)".
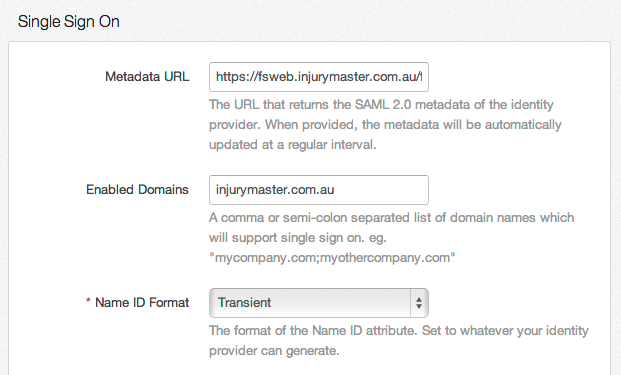
Metadata URL
Enter your identity providers metadata URL into the Metadata URL input.
For ADFS under Windows Server, this will likely be:
Enabled Domains
Specify the email domains, separated by a comma, that will log on via SSO.
For example, if you had users with the email addresses bob@domain1.com and jane@domain2.com that you wanted to sign in via SSO, then you would enter the following as the enabled domains:
Name ID Format
As described in "Setting Up Your Identity Provider" above, select the name ID format your identity provider wishes to use.
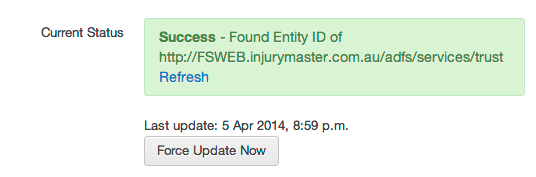
After saving your changes you will see observe Injury Master attempting to contact your identity providers metadata and retrieve it. If successful you will see a message similar to the following:
Step 2. Adding Users
After you have successfully enabled SSO on your account, you can now add your SSO users.
Simply add user accounts as you normally would, specifying each users email address as the same email address that is registered with your identity provider.
SSO users will be marked as such, as seen below, and only SSO users will be able to log in via SSO.

Step 3. Signing In
The final step is to test signing in via SSO.
On the Sign In page, select the "Enterprise" tab and enter your Account ID before clicking "Continue".
Your Account ID is the unique name in your account's URL. For example:

You will then be redirected to your identity provider and prompted to sign in.
Your SSO setup is now complete!