 Injury Master
 Claims Master
 Premium Master
 Data Master
 Master Apps
Documents
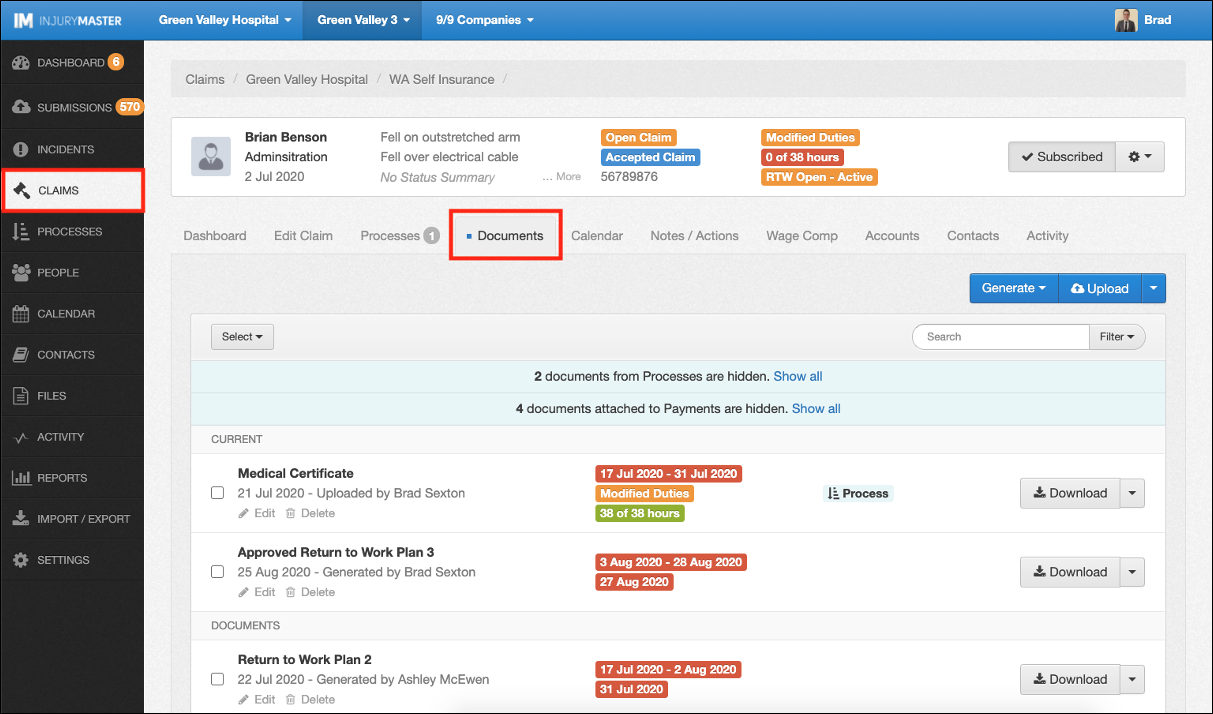
The Documents area of Injury Master is a library for storing all files related to an Incident or Claim. It can be used to generate system Smart Forms / Letters or upload any other file format.
The Documents area can be found from the tab options in any Incident / Claim.
Document Details
Documents are arranged according to upload date / time, with most displayed first. At the very top of the library, the most recent Medical Certificate and Return To Work Plan are displayed under CURRENT.
Each document displays the following information / options:
- Document Name – displays Document Type if no name specified
- Date Uploaded – hover mouse to view time uploaded
- Generated/Uploaded User – hover mouse to view created and updated date / time / user
- Edit – edit document details
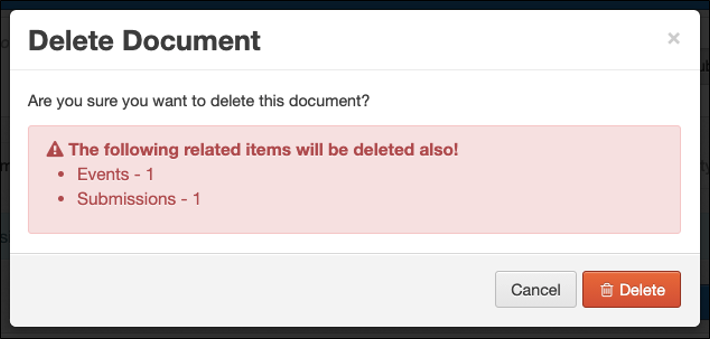
- Delete – opens Delete Document window offering to confirm Delete or Cancel. A Warning message alerts of Events / Submissions / Payments related to document.
- Date Range / Status – date range of Med Cert / RTW Plan / Wage Reimbursement Schedule (Current / Expired)
- Document Tags – including Submitted status
- Download – view content of Smart Form / PDF in system, or save other file format to desktop
- More Options – for handling documents (edit Smart Form, Optimise file size of PDFs, share / submit / collaborate via email)

Each page of the Documents library contains 15 files. You can navigate through the historical documents from the page numbers at the bottom of the page.

Adding Documents
The blue buttons in the top right corner of the Documents library are used to add new documents. The options include:
- Generate – system Smart Forms and Letters
- Upload – other document types
- Upload via Email (behind drop-down arrow)
For further information, please refer to Generate Documents or Upload Documents.

Filtering Documents
Specific documents can be located via typing in the search bar or filtering by Type or attachment status.
For further information, please refer to Filtering Documents.

Hidden Documents
Some documents are hidden by default, including documents in processes, and those attached to payments, compensation periods or other documents. These are identified by a light blue ribbon at the top of the Documents list and can be unhidden by selecting Show All.
For further information, please refer to Viewing Attached / Hidden Documents.

Bulk Handling Documents
By ticking the boxes next to the documents, you can handle multiple documents at the same time. The Select button in the left corner above the documents also allows you to Select All or Select None (deselect).
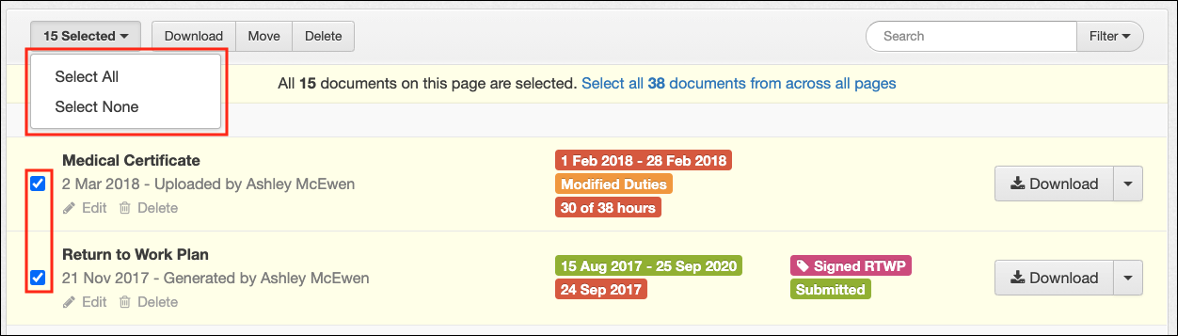
You are then presented with 3 options:
- Download – Save all selected documents to desktop as a ZIP file
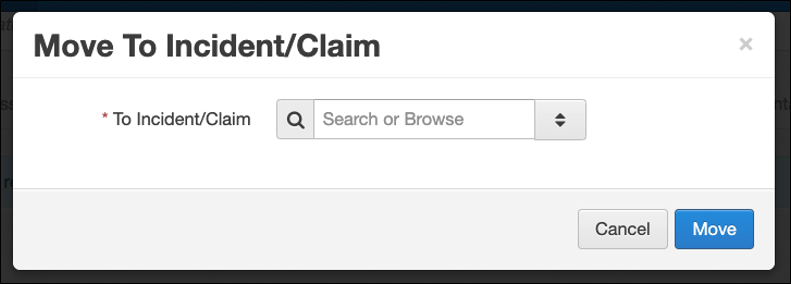
- Move – Move all selected documents to a different Incident / Claim
- Delete – Delete all selected documents. Warning message will display all Events / Submissions / Payments related to selected documents to be deleted