Injury Master
 Claims Master
 Premium Master
 Data Master
 Master Apps
Add / Send / Complete Actions
Actions in Injury Master need to first be created in the system, and then they can be sent to the responsible contact via email. The Action can then be completed by the assigned contact via a link in the email, or if they are an IM user, from the system.
Adding Actions
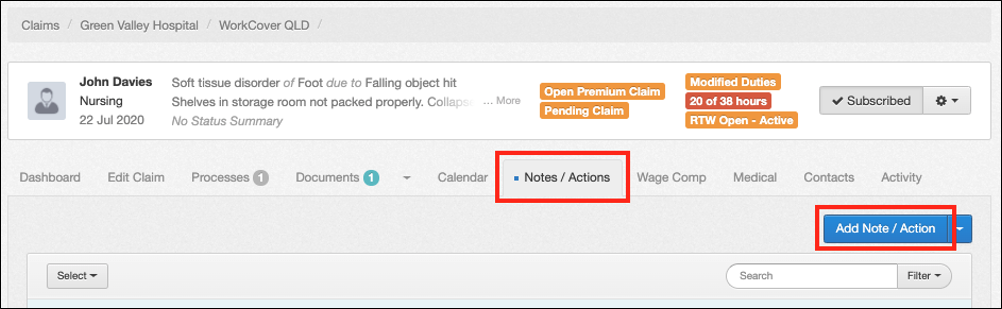
There are 2 methods for adding actions to an Incident / Claim:
- Notes / Actions – Select the blue Add Note / Action button in any Incident / Claim
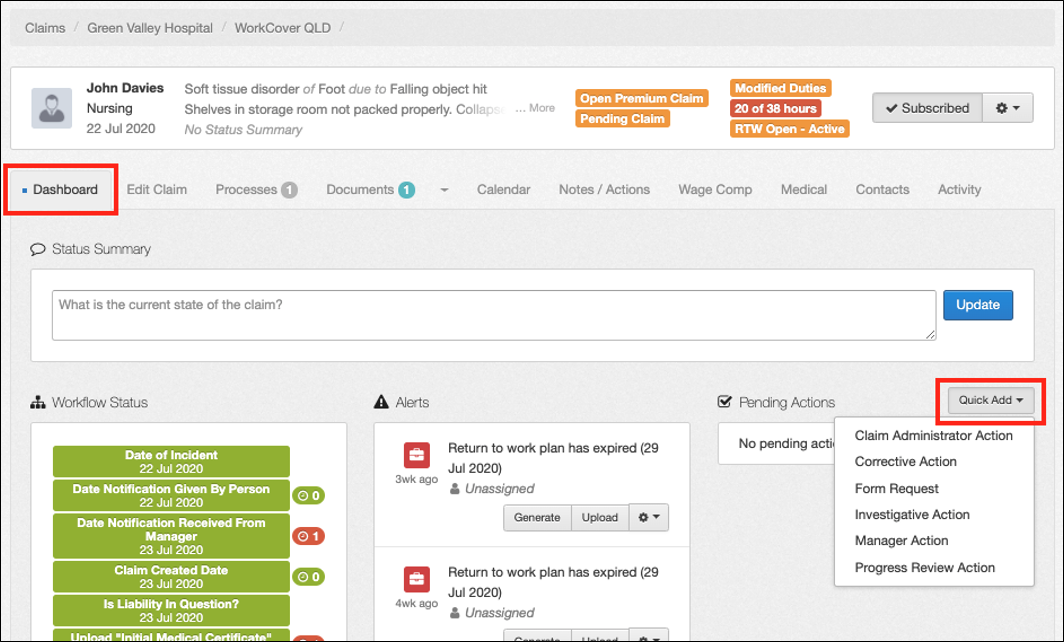
- Dashboard – Select the Quick Add drop-down in the Pending Actions area and select Action Type
Selecting either of the above options will open the following window. If adding from Notes / Actions, the first field for completion will be choosing Action Type from the list available.
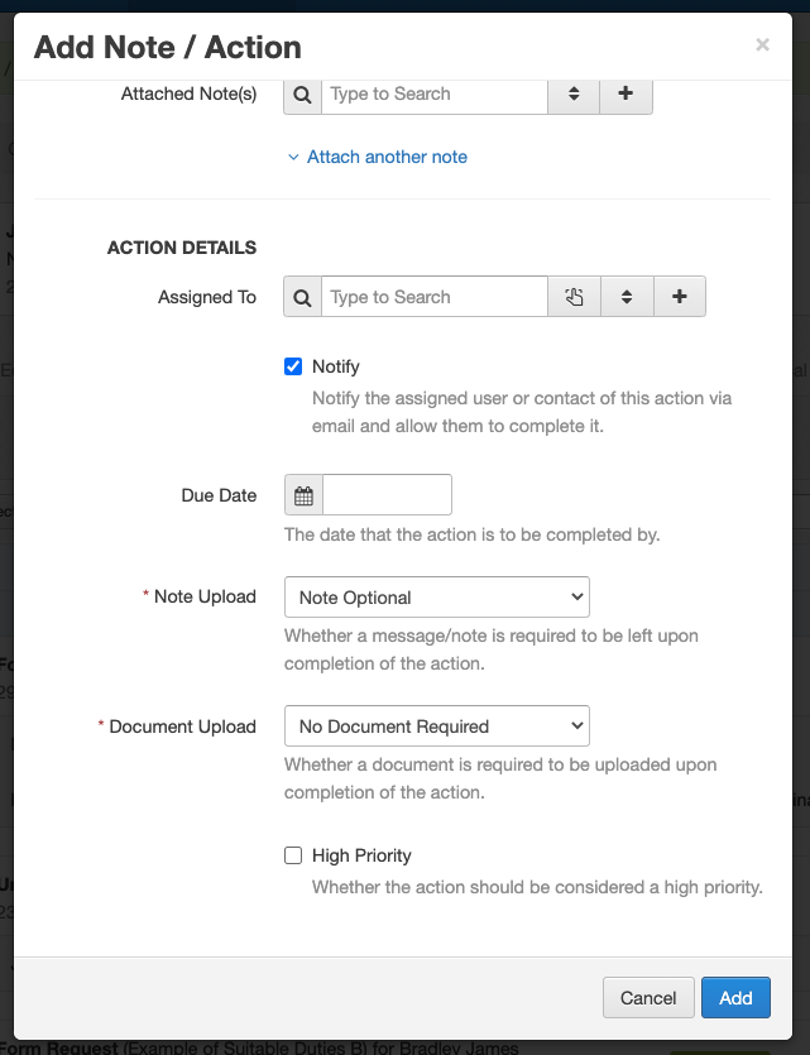
Complete the fields just as when adding general notes, as well as the following ACTION DETAILS. Select Add to create action.
- Assigned To – The contact to make responsible for completion of task. Chosen by;
- Quick Select (contacts assigned to Incident / Claim)
- Browse or type in search bar (all contacts in your account)
- Add (new contact)
- Notify – Whether a notification email is required to be sent (RECOMMENDED ON for assigned contacts who are non-IM users)
- Due Date – When the action should be completed by
- Note Upload – Whether contact is required to enter a note to complete action
- No Note Required
- Note Optional (default)
- Note Required
- Document Upload – Whether contact is required to provide a document to complete action
- No Document Required (default)
- Document Optional
- Document Required
- High Priority – Tags the action as High Priority
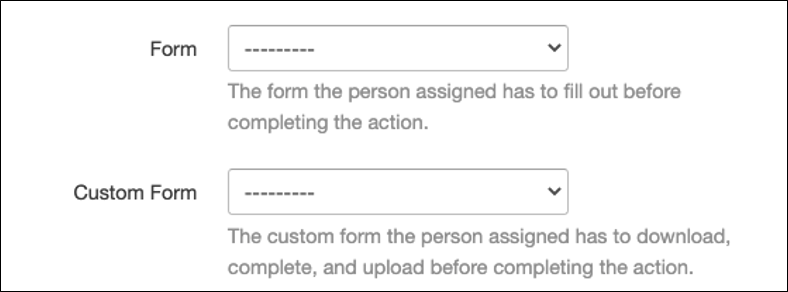
Form Request actions also require selection of a smart form, either Form (system default) or Custom Form (account custom). This appears in place of the Note / Document upload field.
Sending Actions
Once an action is created, it will still need to be sent to the assigned contact (unless Notify was unchecked). There are a few options for sending action notifications.
- Pending Notifications – Select Send Now button in blue ribbon to send notification for all unsent pending actions

- Notify – Select Action(s) from tick box and then select Notify
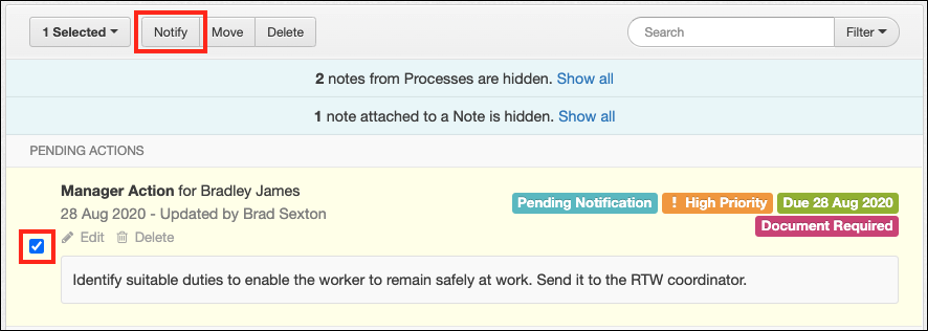
- Workflow – Select pending (blue) action step from workflow and select Send Progress Review Notification

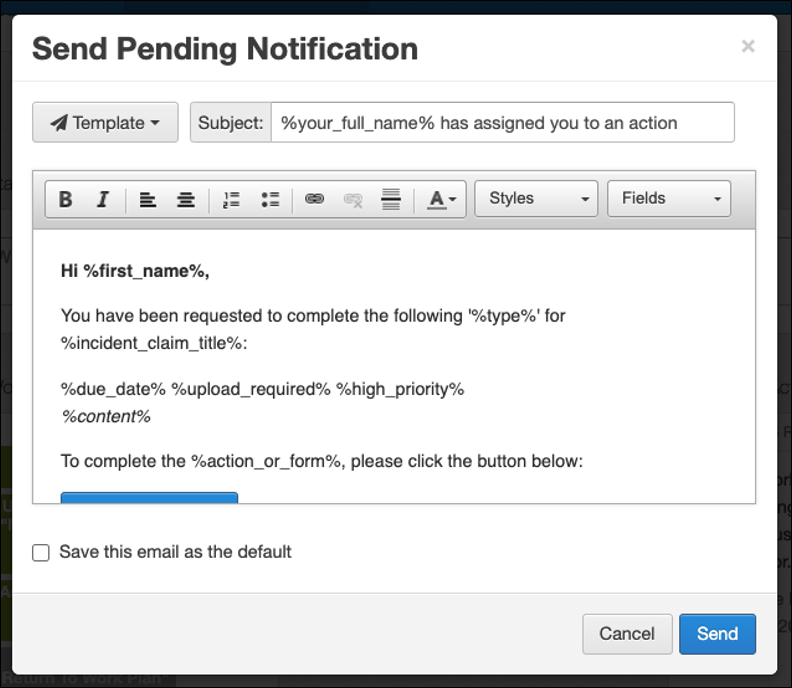
Selecting any of the 3 above options will open the Send Pending Notification. You can customise the content of the email to be sent, then select Send to send email.
Completing Actions
The primary way for assigned contacts to complete actions is from the action notification email. The email will appear as below, including the blue Complete This Action link (wording varies according to completion requirements).
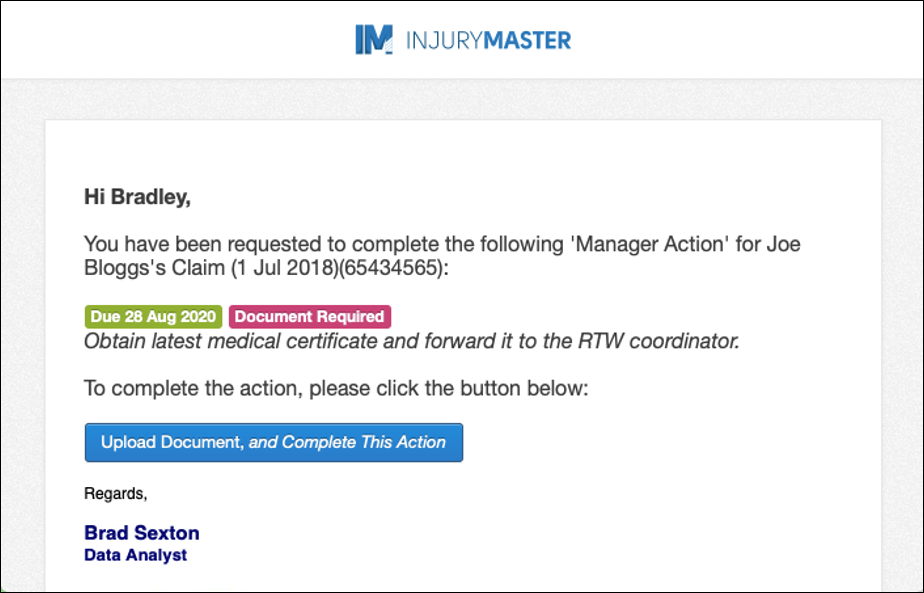
Selecting the Complete This Action button will direct you to the Upload Required page if note or document was required for completion.
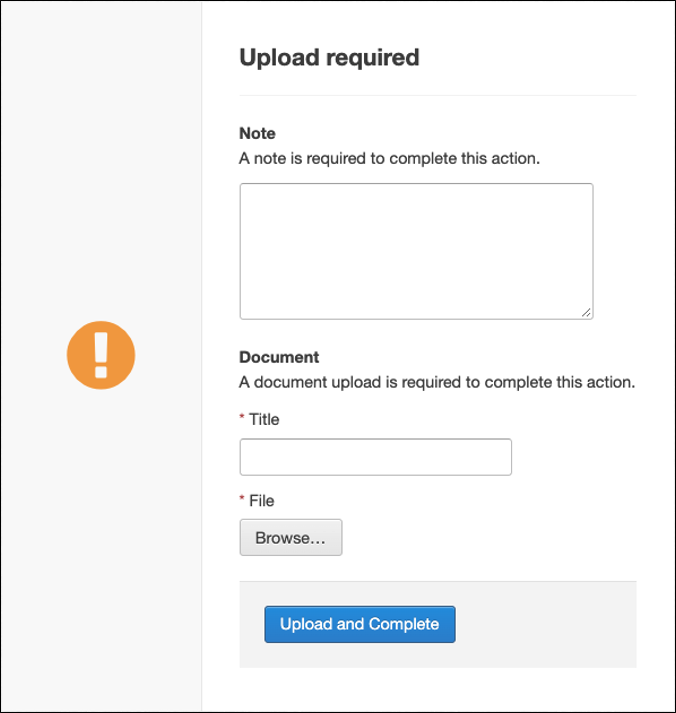
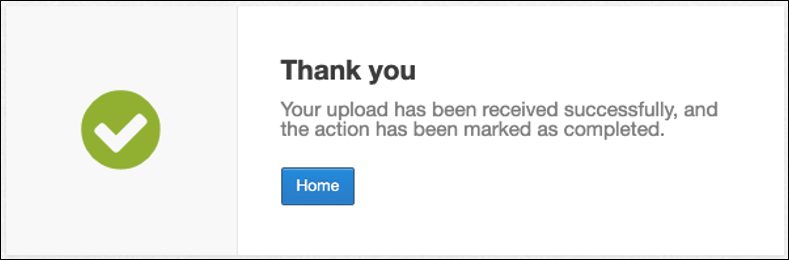
Once required note / document is added, selecting Upload and Complete will redirect to the Thank you page (including note / document upload link if optional). Selecting the Home button will then redirect to the IM DASHBOARD.
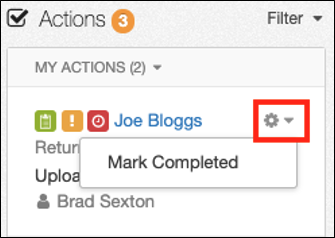
Mark Completed
Actions can also be completed by a Mark Completed button from one of 3 places. This is only an option for actions assigned to yourself as a user, or for actions assigned to non-IM users.
- Files / Notes

- Incident / Claim Dashboard
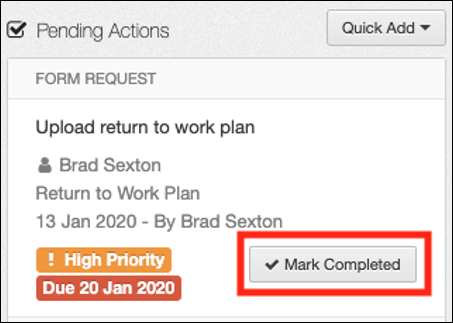
- IM Dashboard