 Injury Master
 Claims Master
 Premium Master
 Data Master
 Master Apps
Incidents Visibility
When viewing your incidents in the Incidents List, there are 4 factors which will affect the visibility of your incidents.
- Company Filter – Determines which companies you can see information for across the system
- Search Bar – Search for specific incidents
- Filter Settings – Restrict incident view according to various filters
- View Options – Customise the information visible in the incident summaries
Company Filter
When you arrive in the Incident List, the incidents which are visible is affected by the companies you have selected to see in the Blue Bar.
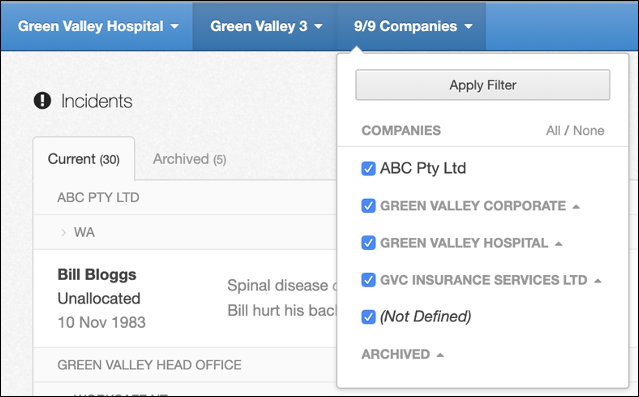
Only incidents within the companies which have been selected will appear in the Incidents List. For more information on the Company Filter, please refer to Navigating Injury Master.
Search Bar
You can search for specific incidents using the search bar at the top of the Incidents List.

Incidents can be searched for by Worker / Location name, Cost Centre, and Injury Details. Type any of the above details into the search bar and hit enter. The Incidents List will then be restricted to those matching your search.
Filter Settings
Selecting the Filter button will bring up the following options by which you can also filter the Incidents List.
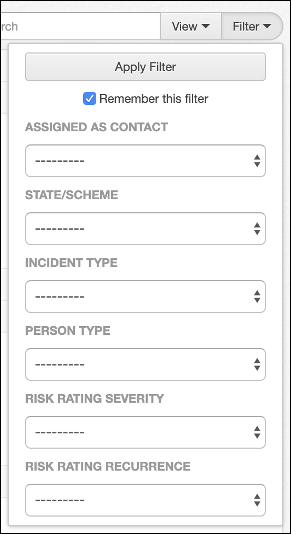
The options that can be selected for each filter category are as follows:
- Assigned as Contact (Incidents to which you are assigned)
- State/Scheme
- Incident Type
- Person Type
- Risk Rating Severity
- Risk Rating Recurrence
Once you have set your desired filters, select Apply Filter to restrict your Incident List according to the chosen filters.
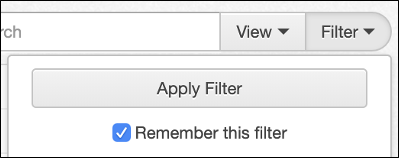
Once you have set a filter, the Filter button will turn Red and a Remove Filter button appear in the Filter view. Selecting Remove Filter will immediately erase any filters you had previously set.
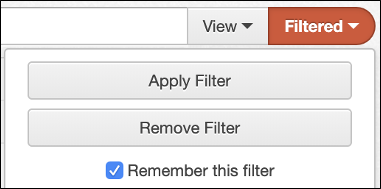
If you have “Remember this filter” selected when you set a filter, this view will remain set for your Incident List until you remove your filters.
Editing Visibility
The Incident summary information visible in the incident list can be customised by selecting the View button.
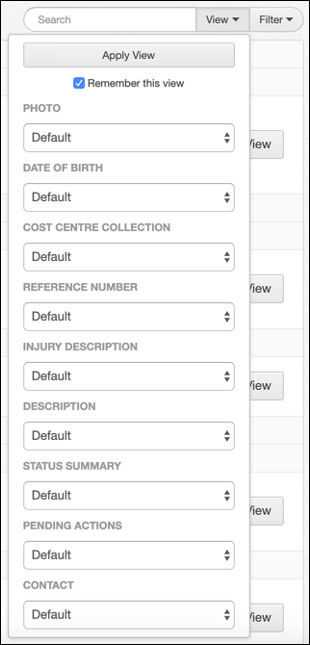
The customisable information categories include:
- Photo (Defaulted to No)
- Date of Birth (Defaulted to No)
- Cost Centre Collection (Defaulted to No)
- Reference Number (Defaulted to No)
- Injury Description (Defaulted to Yes)
- Description (Defaulted to Yes)
- Status Summary (Defaulted to No)
- Pending Actions (Defaulted to No)
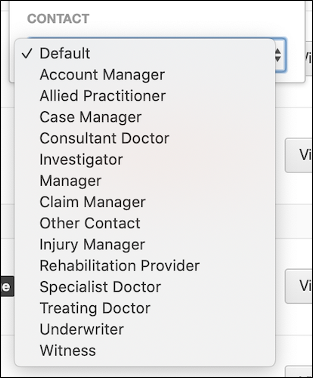
- Contact (Defaulted to None)
Most of the categories have 3 options – Default, Yes & No. The exception is Contact, which provides the full list of contacts according to the Incident Contact tab (as seen below).
Once you have set your desired categories, select Apply View to change the incident summary information. An example of an incident within the Incident List with all views set to “Yes” can be seen below.

When applying view, ticking the “Remember this view” option will set your chosen view as the default for your profile every time you return to the Incident List.

You can also set your desired view as the default for all users on your account. This is done by selecting “Set View as Default for All Users” from the blue drop down arrow next to Add Incident.
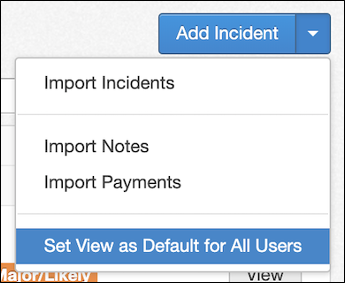
Your selected view will now be the default for all users. Users are still able to edit their personal views.